Fixing Our Leaky Old Stone Basement
Our kids are getting older, and we decided it was time to fix up the basement and build a hangout spot for them. In order to fix up the old stone basement, we had to fix the limestone foundation walls that were allowing rain to enter the basement. We would get about 20 gallons of water in the basement with heavy rainfalls, about 3-4 times per year. (We already replaced the gutters a few years back, which reduced the amount of water in the basement from about 40 gallons of water monthly.) It was time we tuckpoint the exterior limestone basement walls and install an exterior perimeter drain. We got a professional quote for a foundation curtain drain and tuck pointing for $40,000. Since we can DIY just about anything, we decided to fix our leaky stone basement ourselves for about $1,400. Here’s how we did it.
Before the Dig
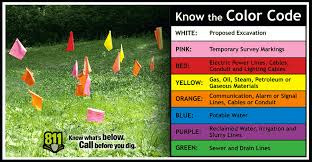
Before digging, it is important to know where your water line, gas line, sewer line, phone line, cable line, and power line enter the house. We had already had One Call (811) come out and mark our lines for a previous project. So we already knew where we had to hand dig.
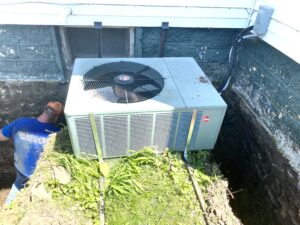
Before we started digging, we had to secure the air conditioner. My husband welded some tubing together, making a 90 degree angle at the ground level. The legs stretched across the ground about 8 feet, creating a nice long bridge to the undisturbed ground. A 3 foot spike secured the end of the bracket, preventing it from moving if there were any cave-ins. We mounted the bracket to the sill plate of the house, and crossed our fingers as we hand-dug under it.
Basement Digging Day!
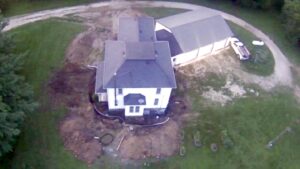
First thing was first, we had to dig up the perimeter of the house, and the drain line. Luckily, we have family that runs an excavation company, so we saved some money (and time). It took about 6 hours for an experienced operator to dig up our fieldstone foundation and exterior french drain line. For a typical DIY’er, a mini-hoe rental in our area costs about $400 per 8-hour day, and I would budget 2 full days. It takes a while to get used to running the machine, and you can easily spend half a day just getting the hang of running the machine.
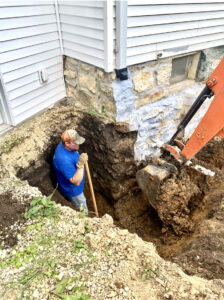
Once we dug down below the stone foundations footers (you need to make sure the drainage tile goes below the foundation, or else you will get MORE water in the basement), we were able to prepare the stone walls for mortar.
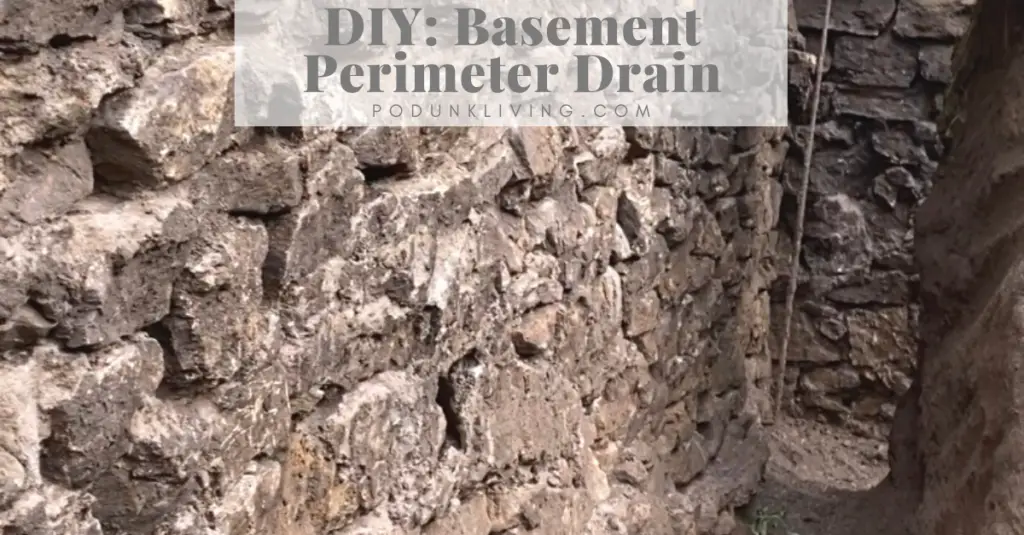
Prepping the Foundation Walls
The easiest way we found to clean the loose old mortar and dirt from the limestone basement walls, was to use an air compressor with a spray nozzle. Prepping the stone walls for tuckpointing took us about a full day to do.
Tuckpointing the Stone Walls
To repair our century homes limestone basement walls, we used type S mortar mix. Our house is about 150 years old, and after some research, type S mortar mix would be appropriate for mortar repair. We used a concrete mixer to give the most consistent results when mixing the mortar. You can mix concrete with a wheelbarrow and shovel. However, we mixed about 25 bags of mortar, which would have been a royal pain to do! Manually mixing would have also caused inconsistent results with that many batches, and the mortar would have either ended up too thick or too thin. The corners of the house needed structural repair, so we went through a lot more mortar to restack the stones and mortar them in. This structural damage was likely due to years of improper downspout drainage and leaky gutters. The foundation problems in the corners were also the most likely locations of water penetration through the limestone foundation wall.
Waterproofing Paint Over the Limestone Foundation Exterior
The waterproof paint (WaterTite) we purchased is rated up to 34 psi for waterproofing purposes. It was a bit more expensive than the other types of waterproof paint, but had the highest PSI rating. Since I didn’t want to have to redo this foundation curtain drain project, we decided to purchase the best quality paint. When applying the paint, we decided to try to spray it on with a texture sprayer. This paint is too thick to use a conventional paint sprayer (even a professional sprayer), and we did not want to ruin our $300 paint sprayer. So we tried spraying the waterproof paint with our texture sprayer, which worked well! (And saved us a LOT of time!)
Installing the Foundation Drainage Tile
Once the stone foundation walls were tuckpointed and coated with waterproofing paint, we could grade the trench for drainage tile. We ensured the 4″ perforated tile with a sleeve was below the footer and sloped away from the house, towards the ditch to daylight. Once the perimeter drain was installed, we used a 4″ solid drain to run it across the driveway to the ditch, maintaining the downward slope from the house. We covered the pipe with 1″ rock, filling the trench with about 2 feet of rock to encourage any water to head towards the pipe instead of the basement. We could now backfill the trench with dirt, and grade the ground with a slope to encourage the rain to flow away from the house.
Burying the Downspouts for Curb Appeal
Once the ground was graded, and most of the massive dirt piles were out of the way, we were able to bury the downspouts. We used these downspout couplers to create a tight transition from the downspout to the solid drainage tile (do NOT use perforated). The downspouts drain a LOT of water, so it is important to ensure that they are properly sloped away from the house, and carry the water at least 15 feet away from the house. One side of our house has a nice slope, and we were able to carry the water to daylight. The opposing side of the house does not slope much. For that side, we dug a sloping trench 20 feet from the house, then dug a leach line approximately 4 feet deep and 10 feet long. We filled the leach line with rock, laid the 10 feet of perforated pipe (ensuring the perforated was lower than the solid drain pipe), and connected a popup emitter at the end of the perforated pipe. We then backfilled the downspout trenches with dirt, and finished grading work around the house.
Dirt Work: Grading, Compaction, and Settling
After a couple of heavy rains, the ground settled a bit. So we were able to use some leftover dirt to level the ground and maintain the slope away from the house. So far, our moisture problems have been solved.
Radon Testing
After sealing up the basement, we decided to purchase a radon monitor. Our radon levels were tested when we purchased the house, and were below the threshold for mitigation. However, since we’ve disturbed the ground and sealed the potential air leaks, we thought it important to check our radon levels. Radon is an odorless gas found in the soil under homes, which can cause lung cancer. Radon is becoming an increasing issue in homes as they are becoming more airtight with insulation, double-paned windows, and energy-efficient improvements. The recommendation of the radon monitor is to obtain an average reading for a couple of months before deciding on the need for mitigation. However, so far it appears that radon mitigation will be our next project.
Air Conditioner Compressor Bridge
We could have had the air conditioner vacuumed down, and disconnected from the house. However, our unit is old and operates on R-22. R-22 is now banned in the United States, and if the vacuum system or storage container were to leak, we would have to buy a whole new air conditioner (and possibly a new furnace). We decided not to take the risk, and build a bracket for the unit to sit on while digging under it.
Stone Basement Repair and Waterproofing Cost Breakdown
| Material List | Cost |
|---|---|
| 100′ Perforated 4″ perimeter pipe 100’ Cover sock for perforated pipe 100′ Solid 4″ drain pipe Downspout connectors 4″ couplers 4″ Y connectors Pop-up drain emitter 1/2″ clean rock Metal brackets for air conditioner stand Mortar Waterproof paint Mineral spirits | $68.49 $21.97 $68.49 $5.28 each $3.19 each $7.99 $18.47 $300 $20 $9.68 each $194 each $5.99 |
| Equipment List | Cost |
| Mini hoe Air compressor Air hose and couplers High-pressure nozzles Shovels Cement mixer Laser level Texture sprayer Paint brushes & rags Gloves | $400/day $129 $26.69 $9.99 $17.79 $319.99 $20.46 $71.18 $15 $8 |
| Our Total Cost | $1,395.39 |
Rednecks With Paychecks Projects: