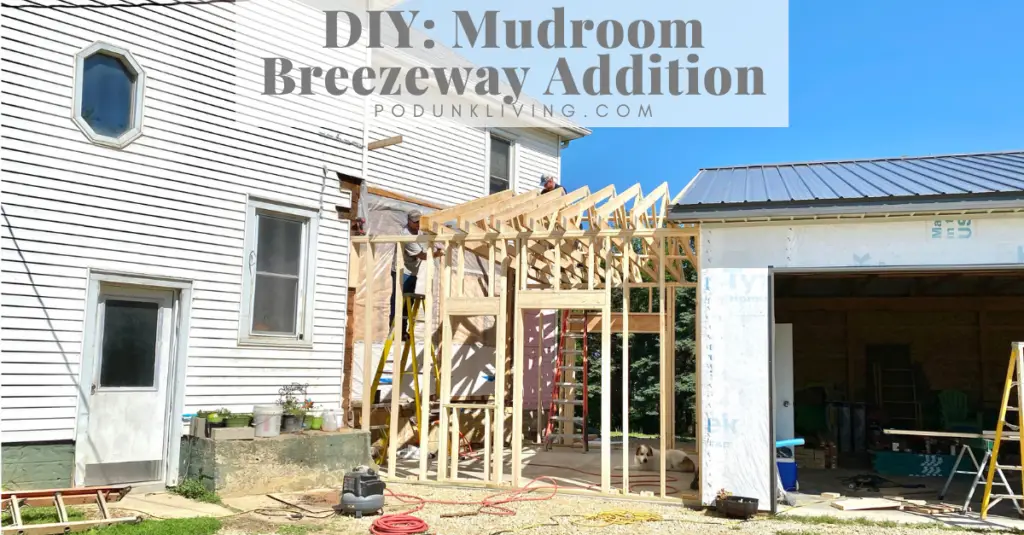
DIY Mudroom Breezeway Addition
When we bought our old farmhouse, we knew it would be years of projects, hard work, and sweat equity. We are not done with our old house, but it is coming along, and our family and friends love to see our progress. The new mudroom breezeway addition was a large undertaking, and we needed a little help from some family to completely DIY. By doing it ourselves, we were able to build the mudroom addition for about $5,000 (we splurged on our $800 new front door). The home’s breezeway was intended to become the new main entrance to the home, a great place for our young children to shed their muddy boots, coats, hats, book bags, etc. after coming home from school.
Here’s how to do a garage addition:
Building the Garage
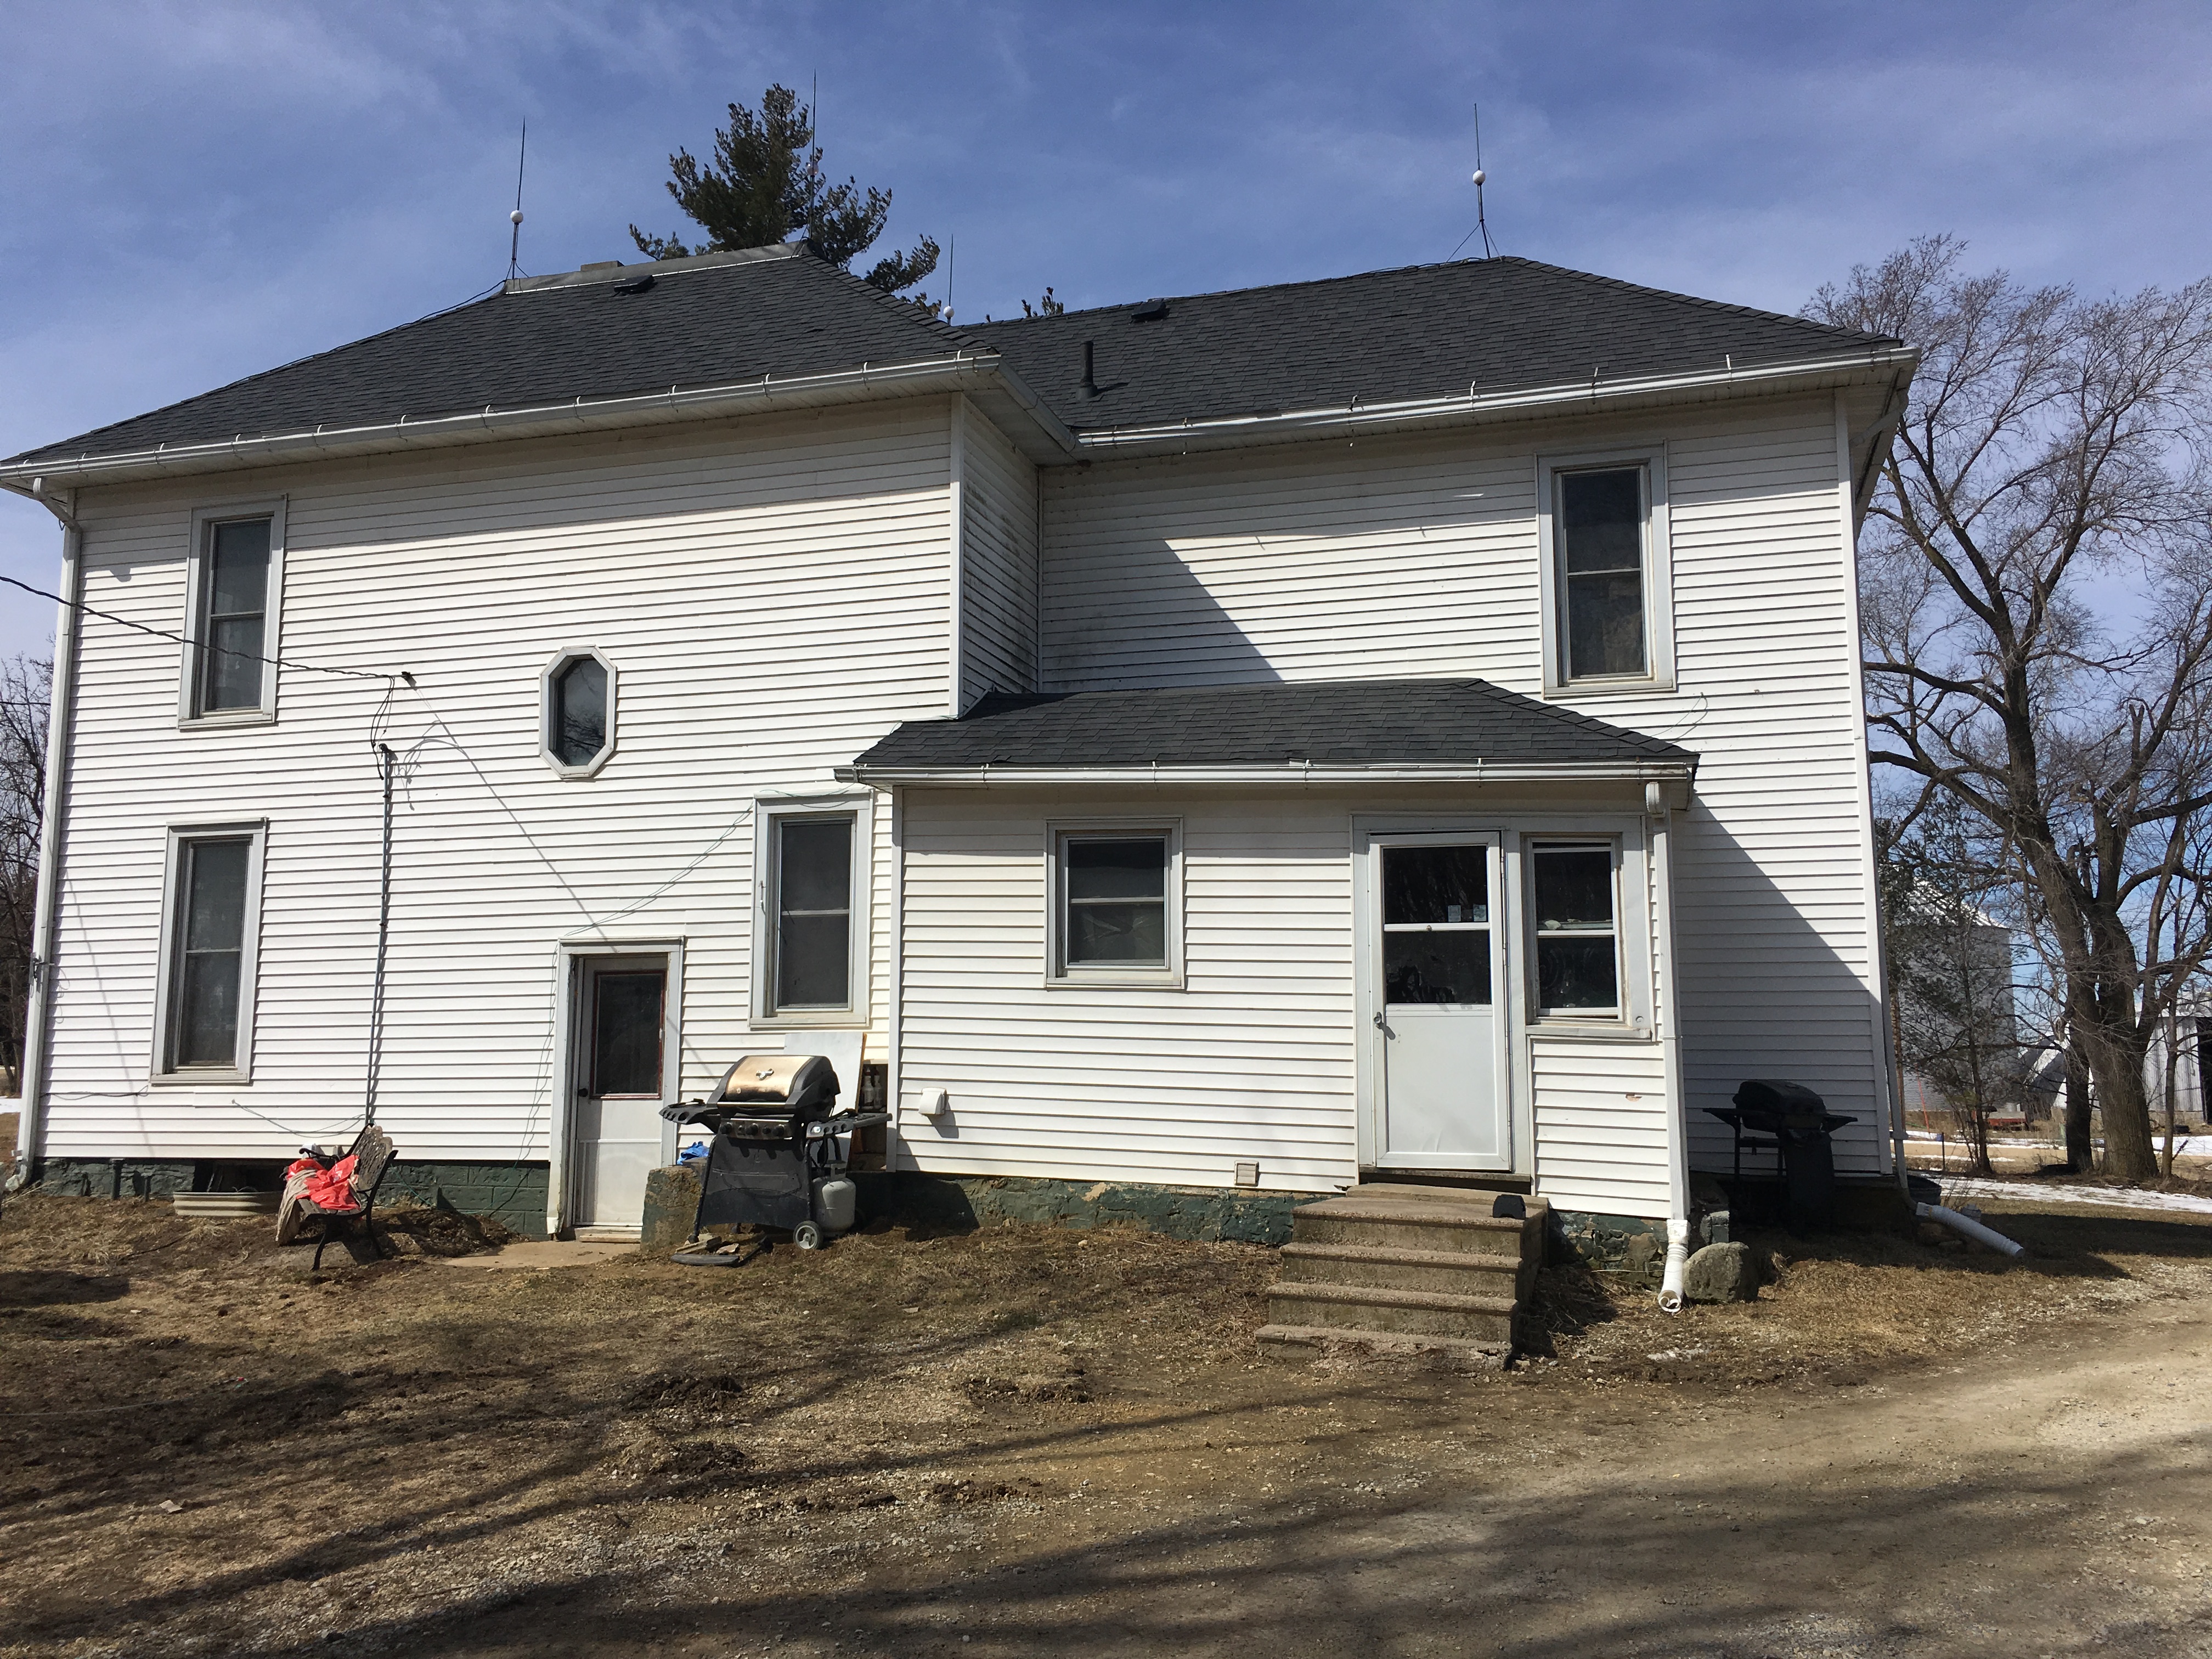
Living on a farm, a mudroom area was non-negotiable. Our house originally had a mudroom, however it was sinking into the ground and pulling away from the main house.
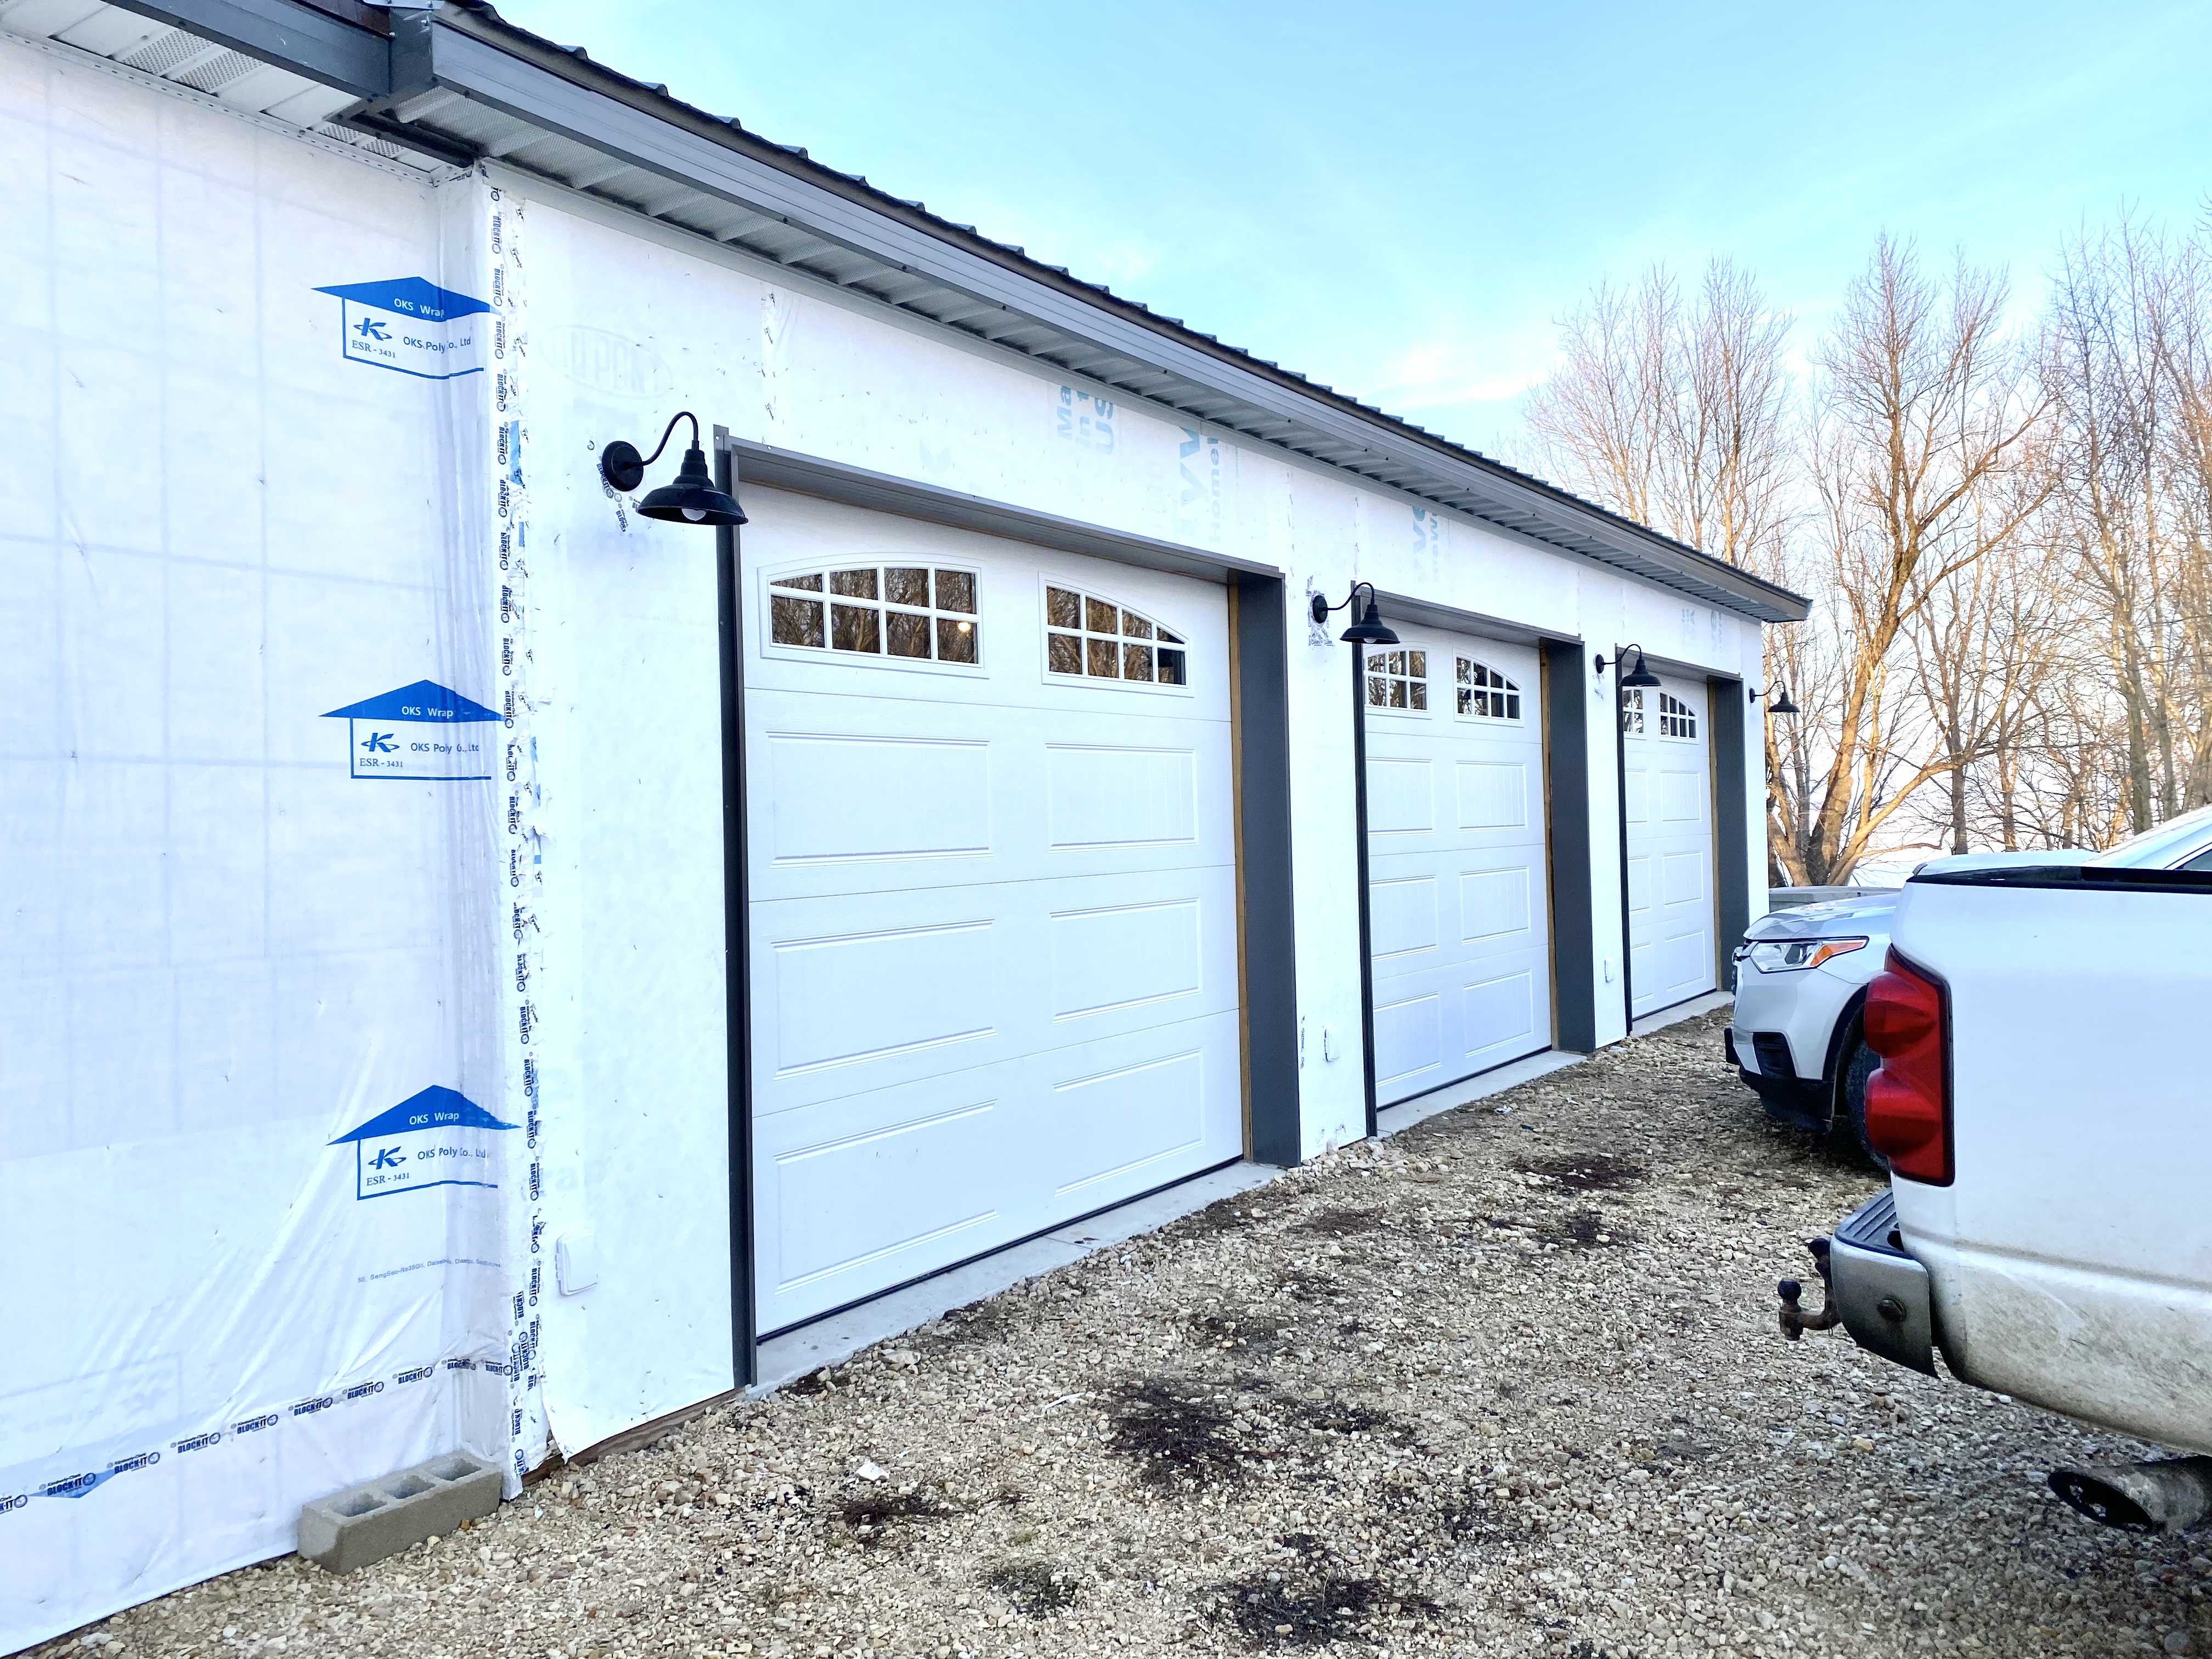
We had gotten used to the buffer zone between the cold outdoors and the warm kitchen, and didn’t like the cold drafts every time someone went in or out of the house. We also wanted an enclosed breezeway to connect from our kitchen to our newly built detached garage. Attaching a mudroom breezeway to a detached garage addition (about $35,000 cost for our 3 car garage addition) which was cheaper than building an attached garage addition to our existing home costs ($80,000 was what we were quoted). Plus, we had a very difficult time finding a contractor to even give us a quote. The best option we had was to go with a pole barn builder who let us customize the post frame garage addition as much as we wanted.
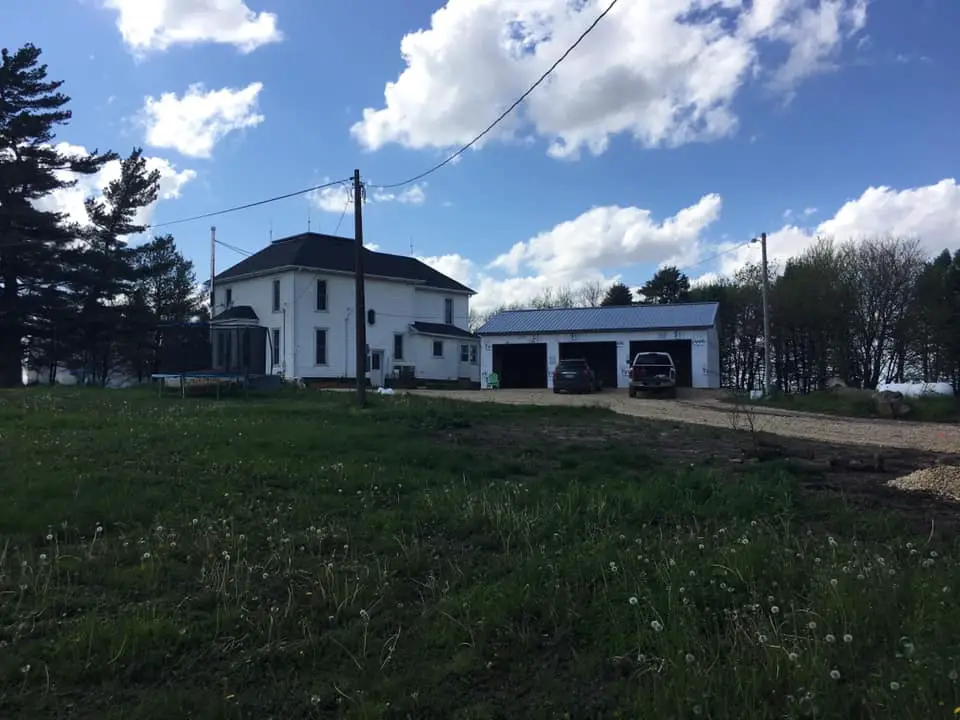
We left the building as a shell, so we could save money by doing as much as we could ourselves. We chose a plywood exterior, so we could put up vinyl siding to match the house. The garage was built in about 2 days, and the concrete was done about a week later. The builder allowed us time to lay the insulation, and radiant heat pex before pouring the concrete.
Relocating the Laundry
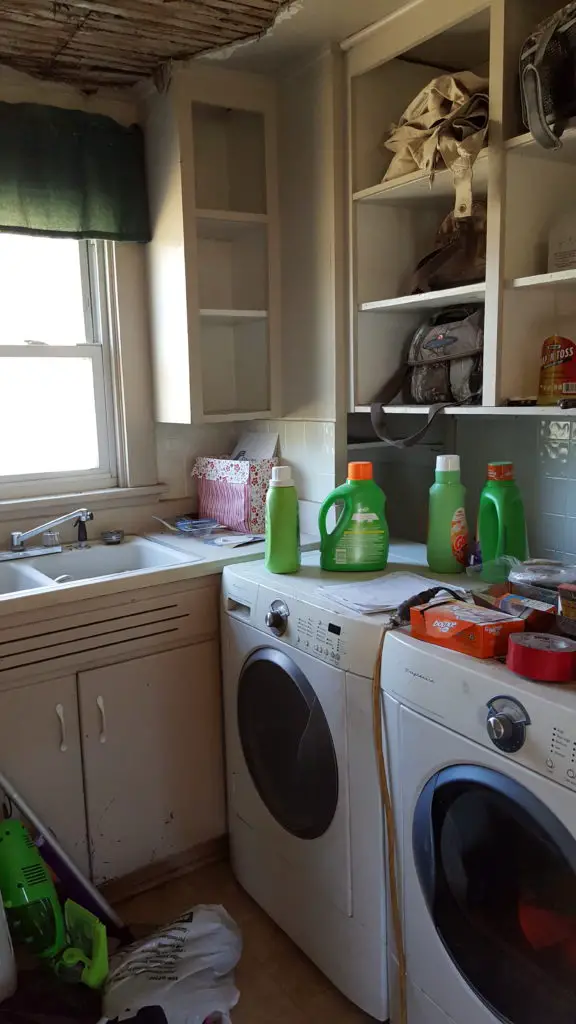

We had already relocated the laundry area from the original mudroom, to the second floor across from the bathroom. Most of our family and friends said we were nuts, that the laundry room should be near the existing kitchen (where the vast majority of homes have the laundry located). I then demonstrated that all of the clothes end up in the upstairs bathroom and I can literally throw the clothes from the bathroom into the laundry room. When they realized this, they all started to think about relocating their laundry rooms.
Demo Day!
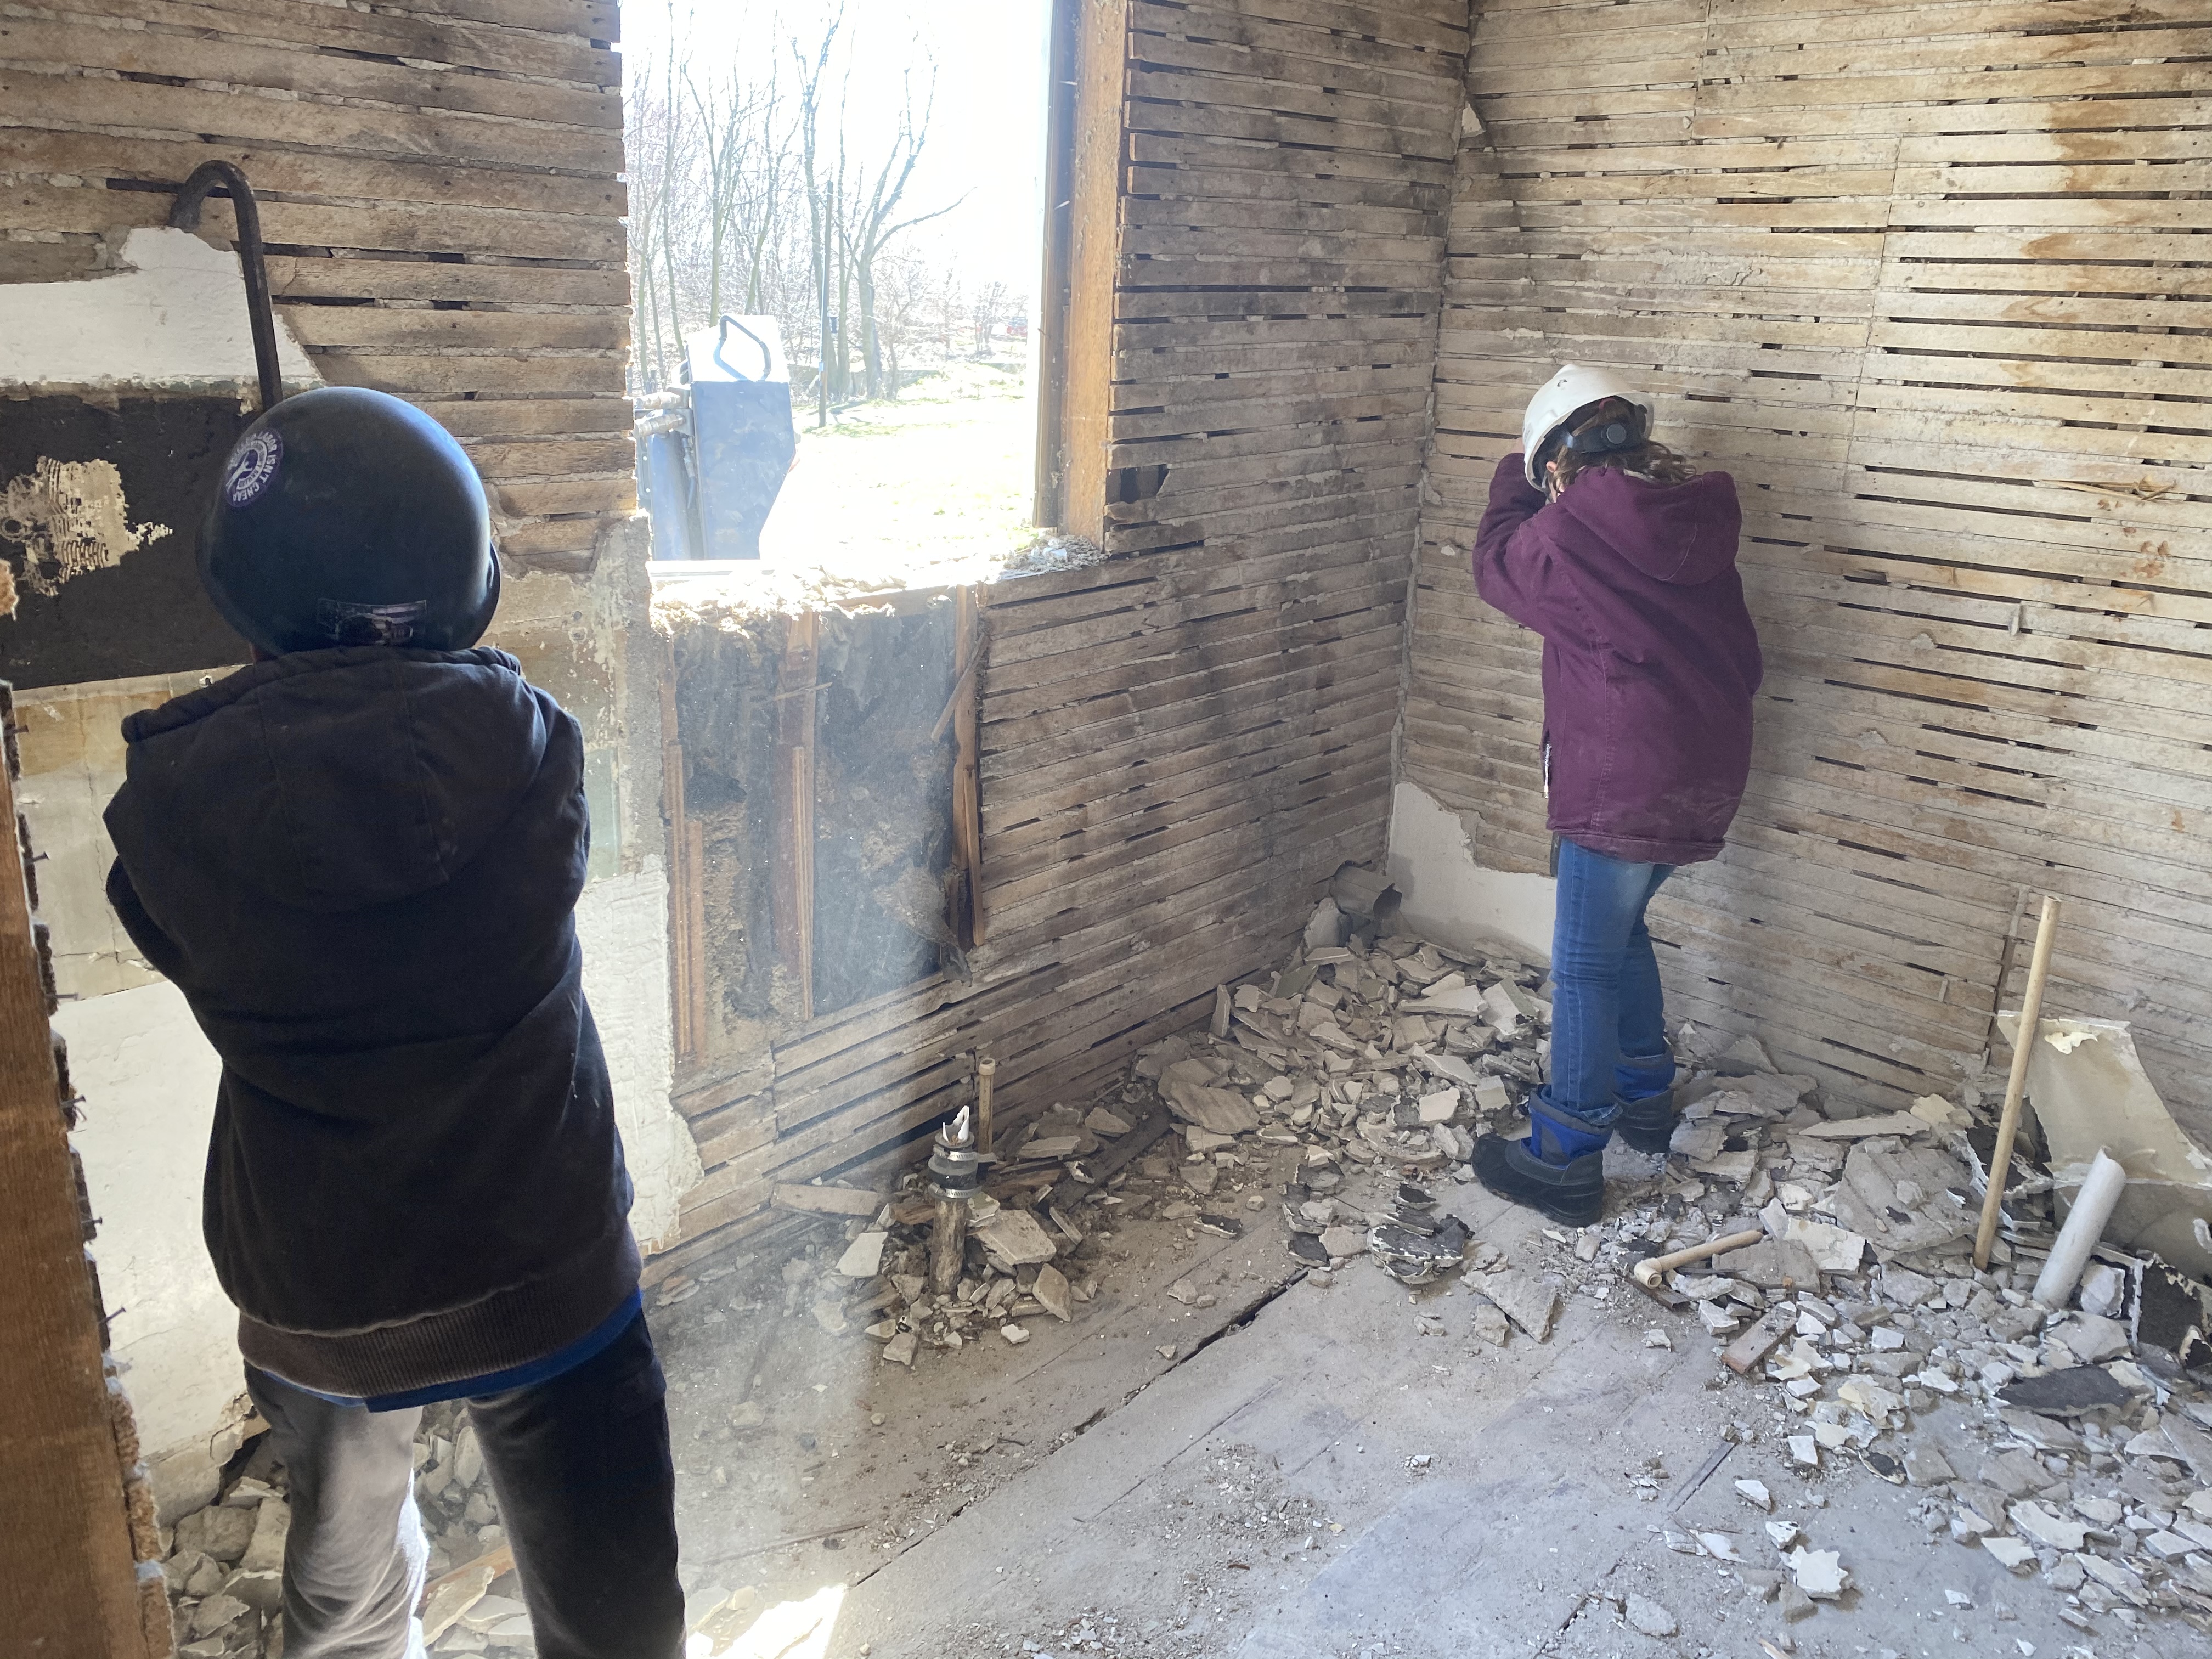
Once spring arrived, we immediately began demoing the dilapidated mudroom. A few bonfires later, we had the location for the garage breezeway cleared.

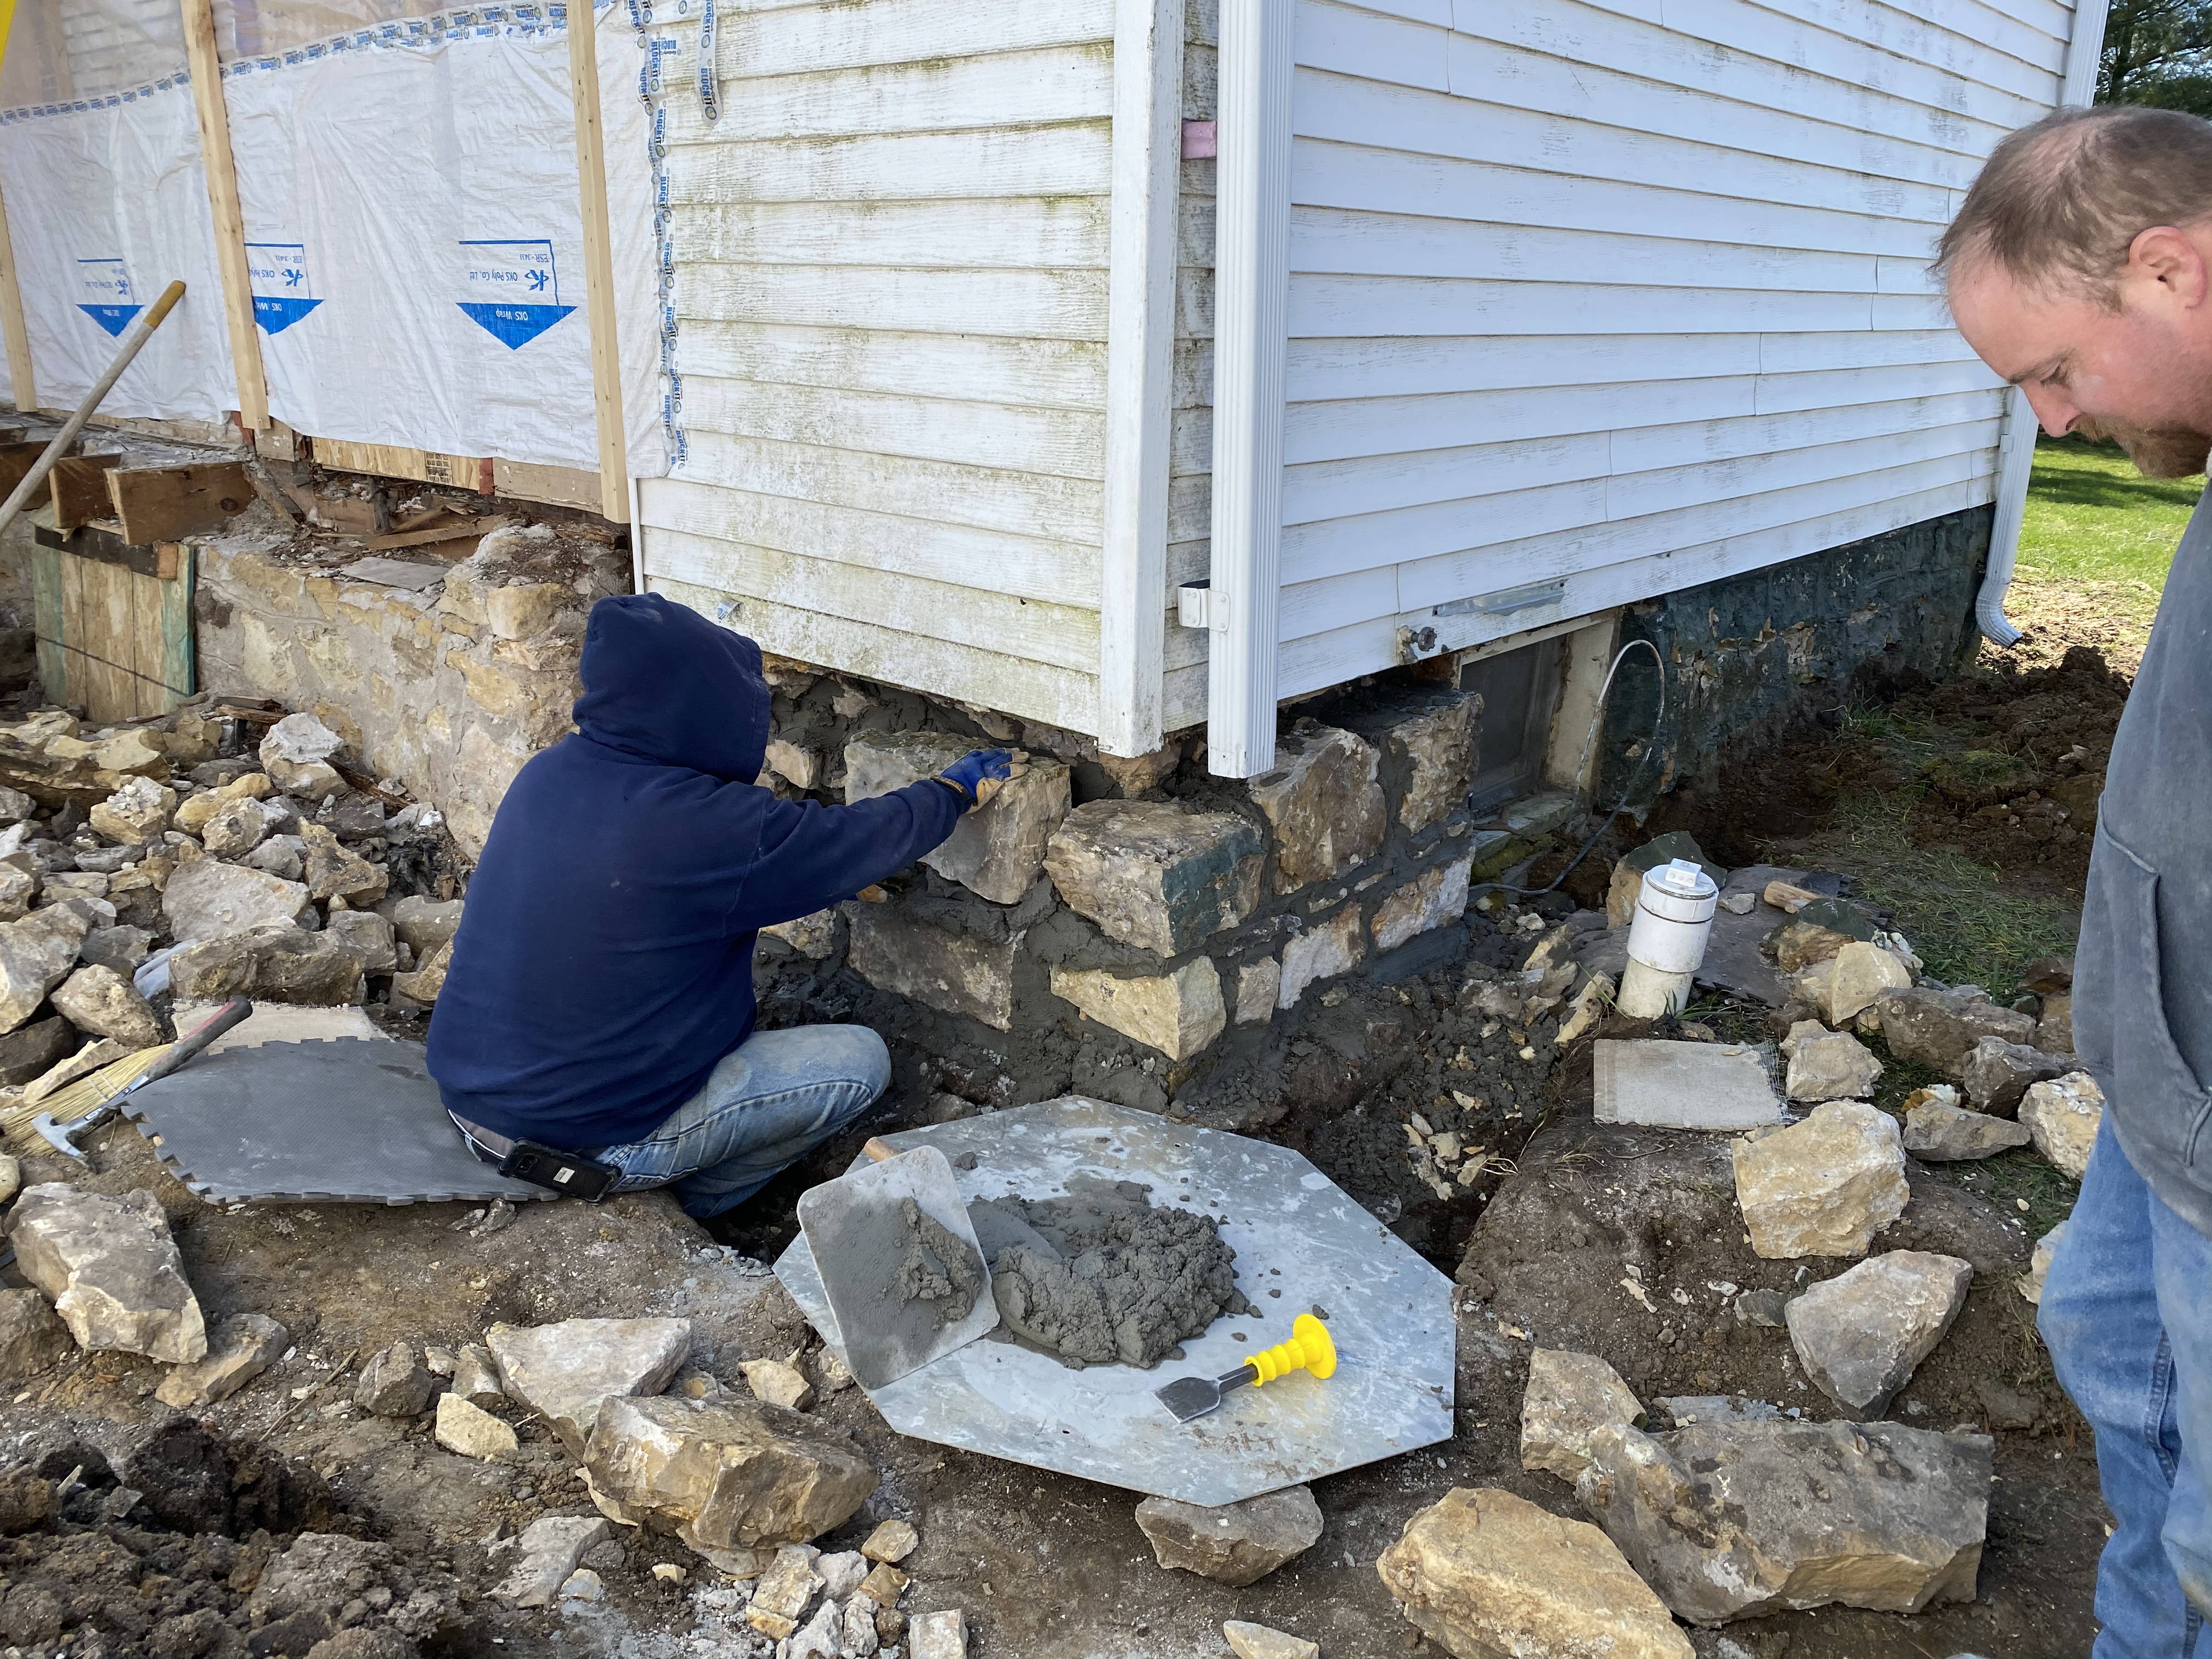
It took some time to remove the foundation and level the area, and we discovered a storage cellar in the process.
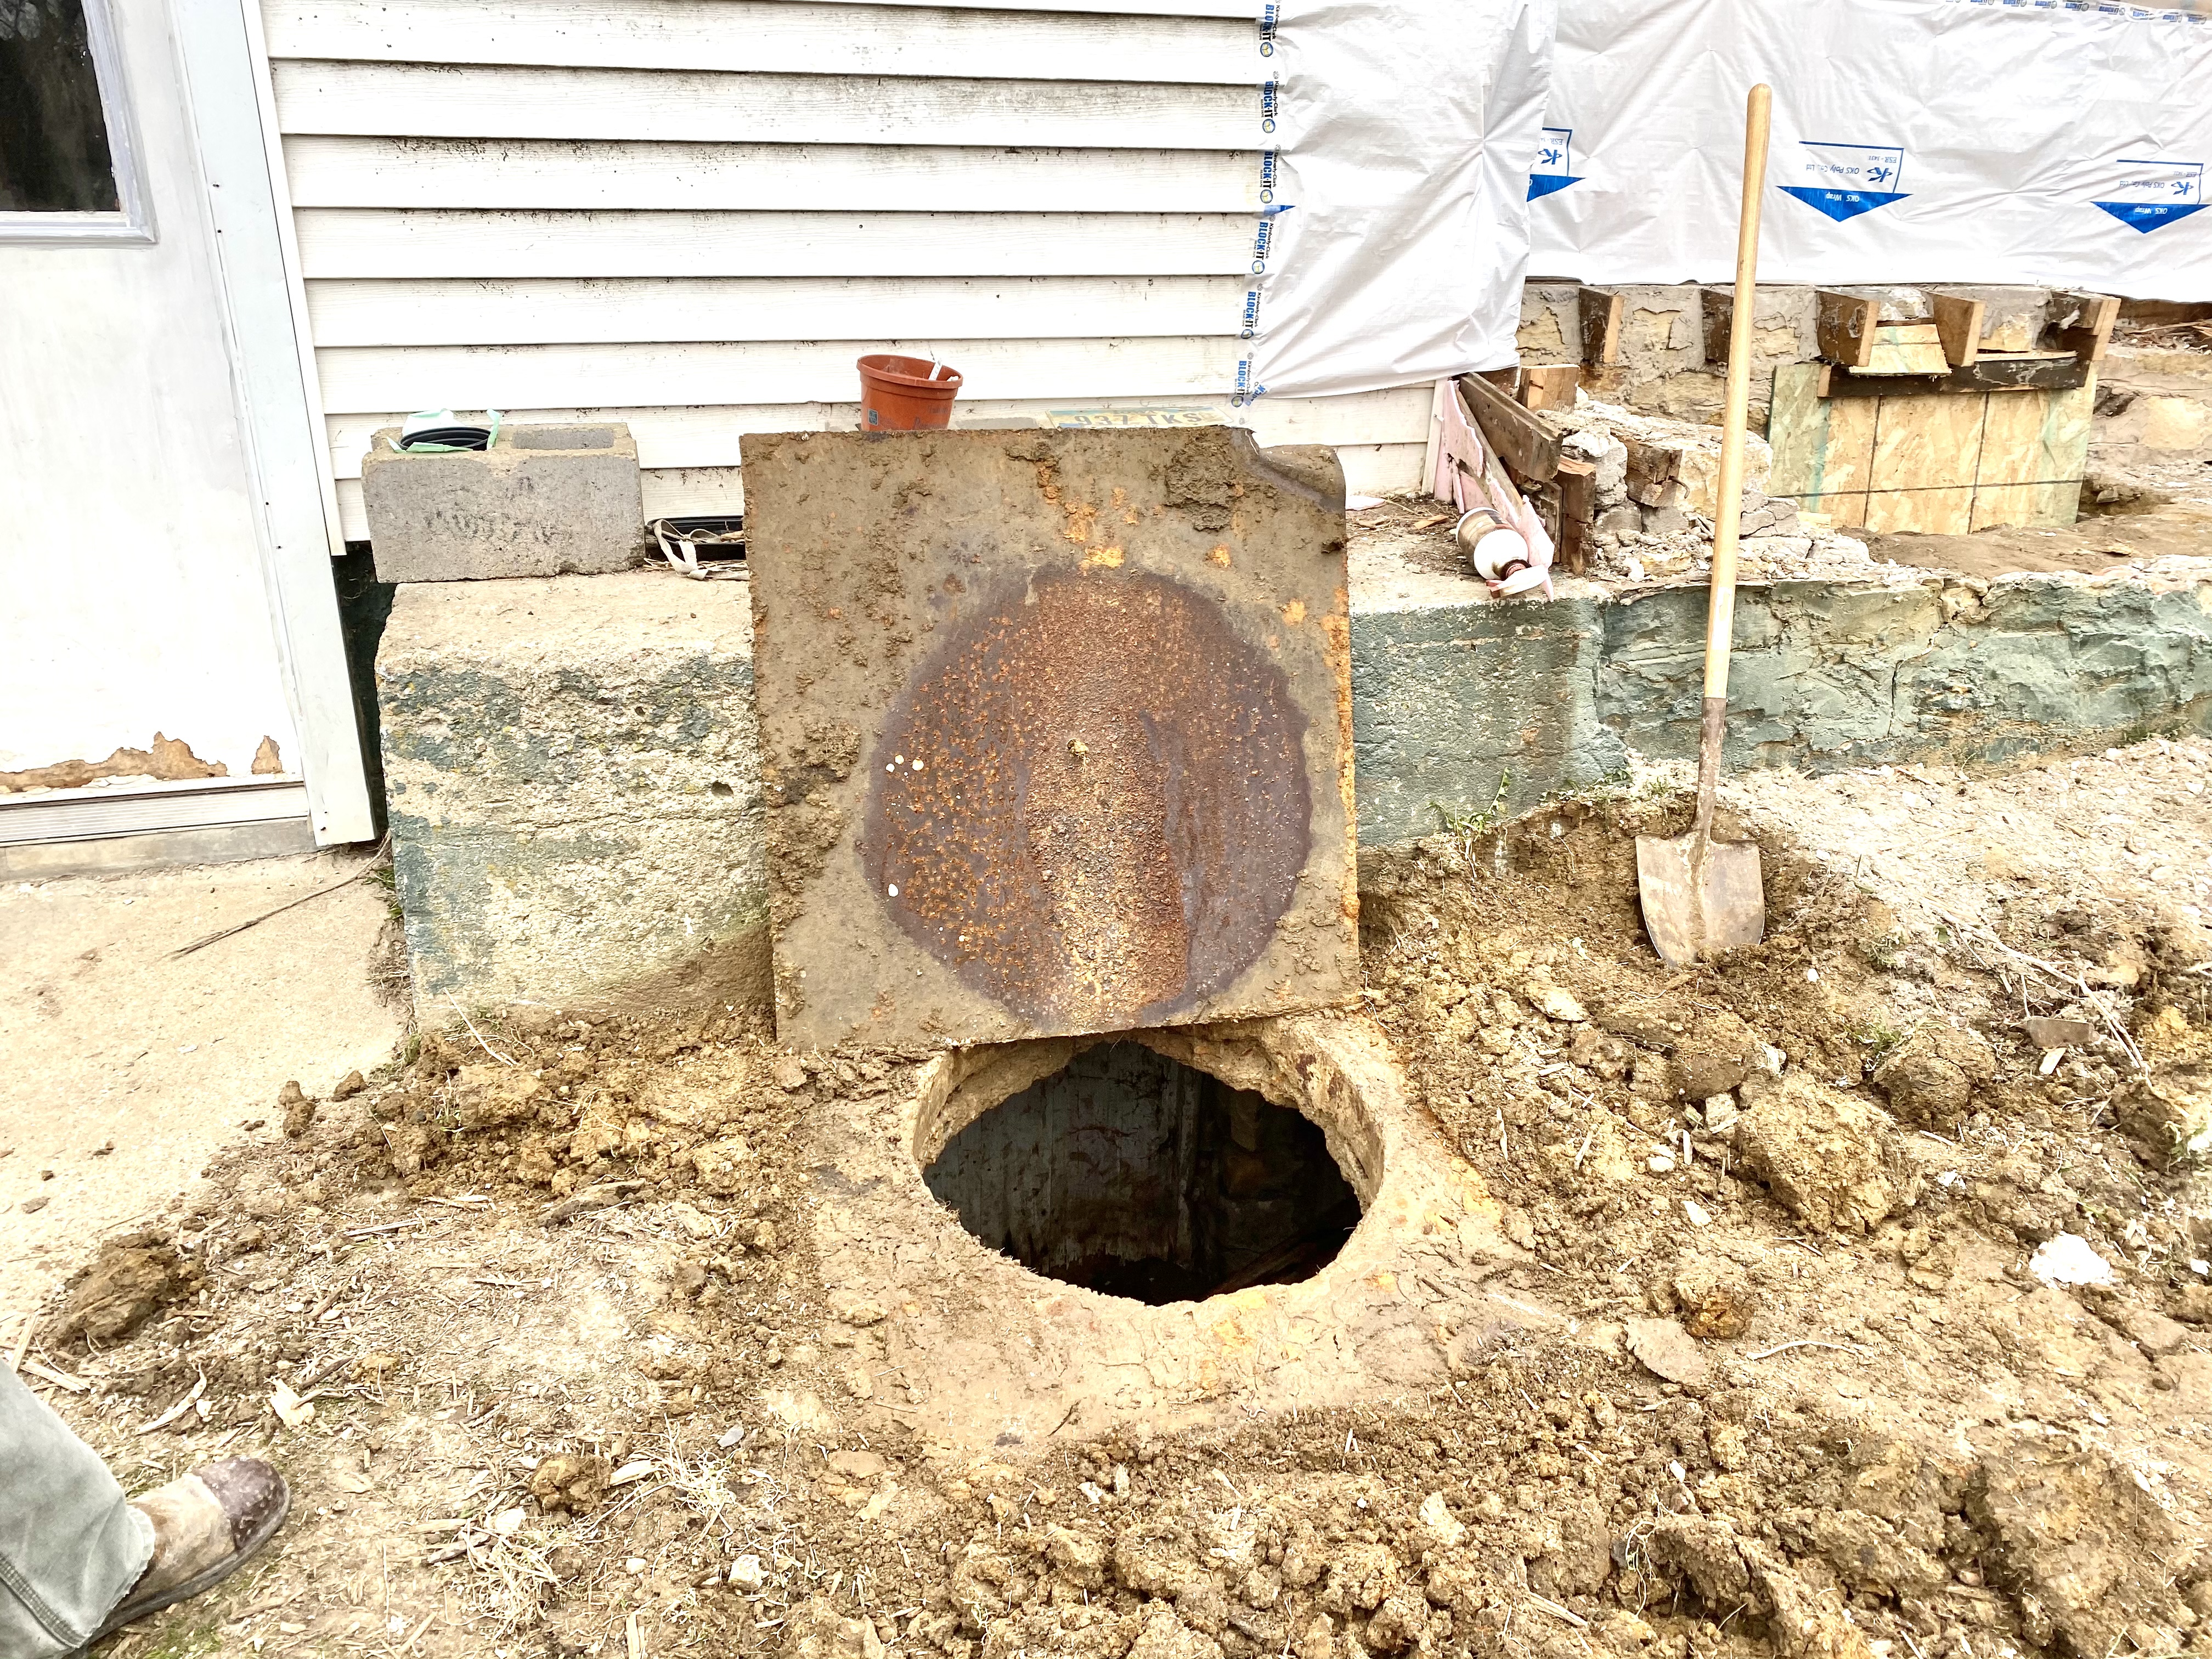
We tuck pointed the existing limestone foundation, and fixed some crumbling areas due decades of the house not having gutters.
Pouring the Radiant Heat Concrete Floor
We then dug our 4′ footers, and used leftover cinder blocks with rebar for footings. We then framed up and poured the concrete floor.

We added insulation under the slab and in floor radiant heat, to keep the new addition cozy in the cold months.
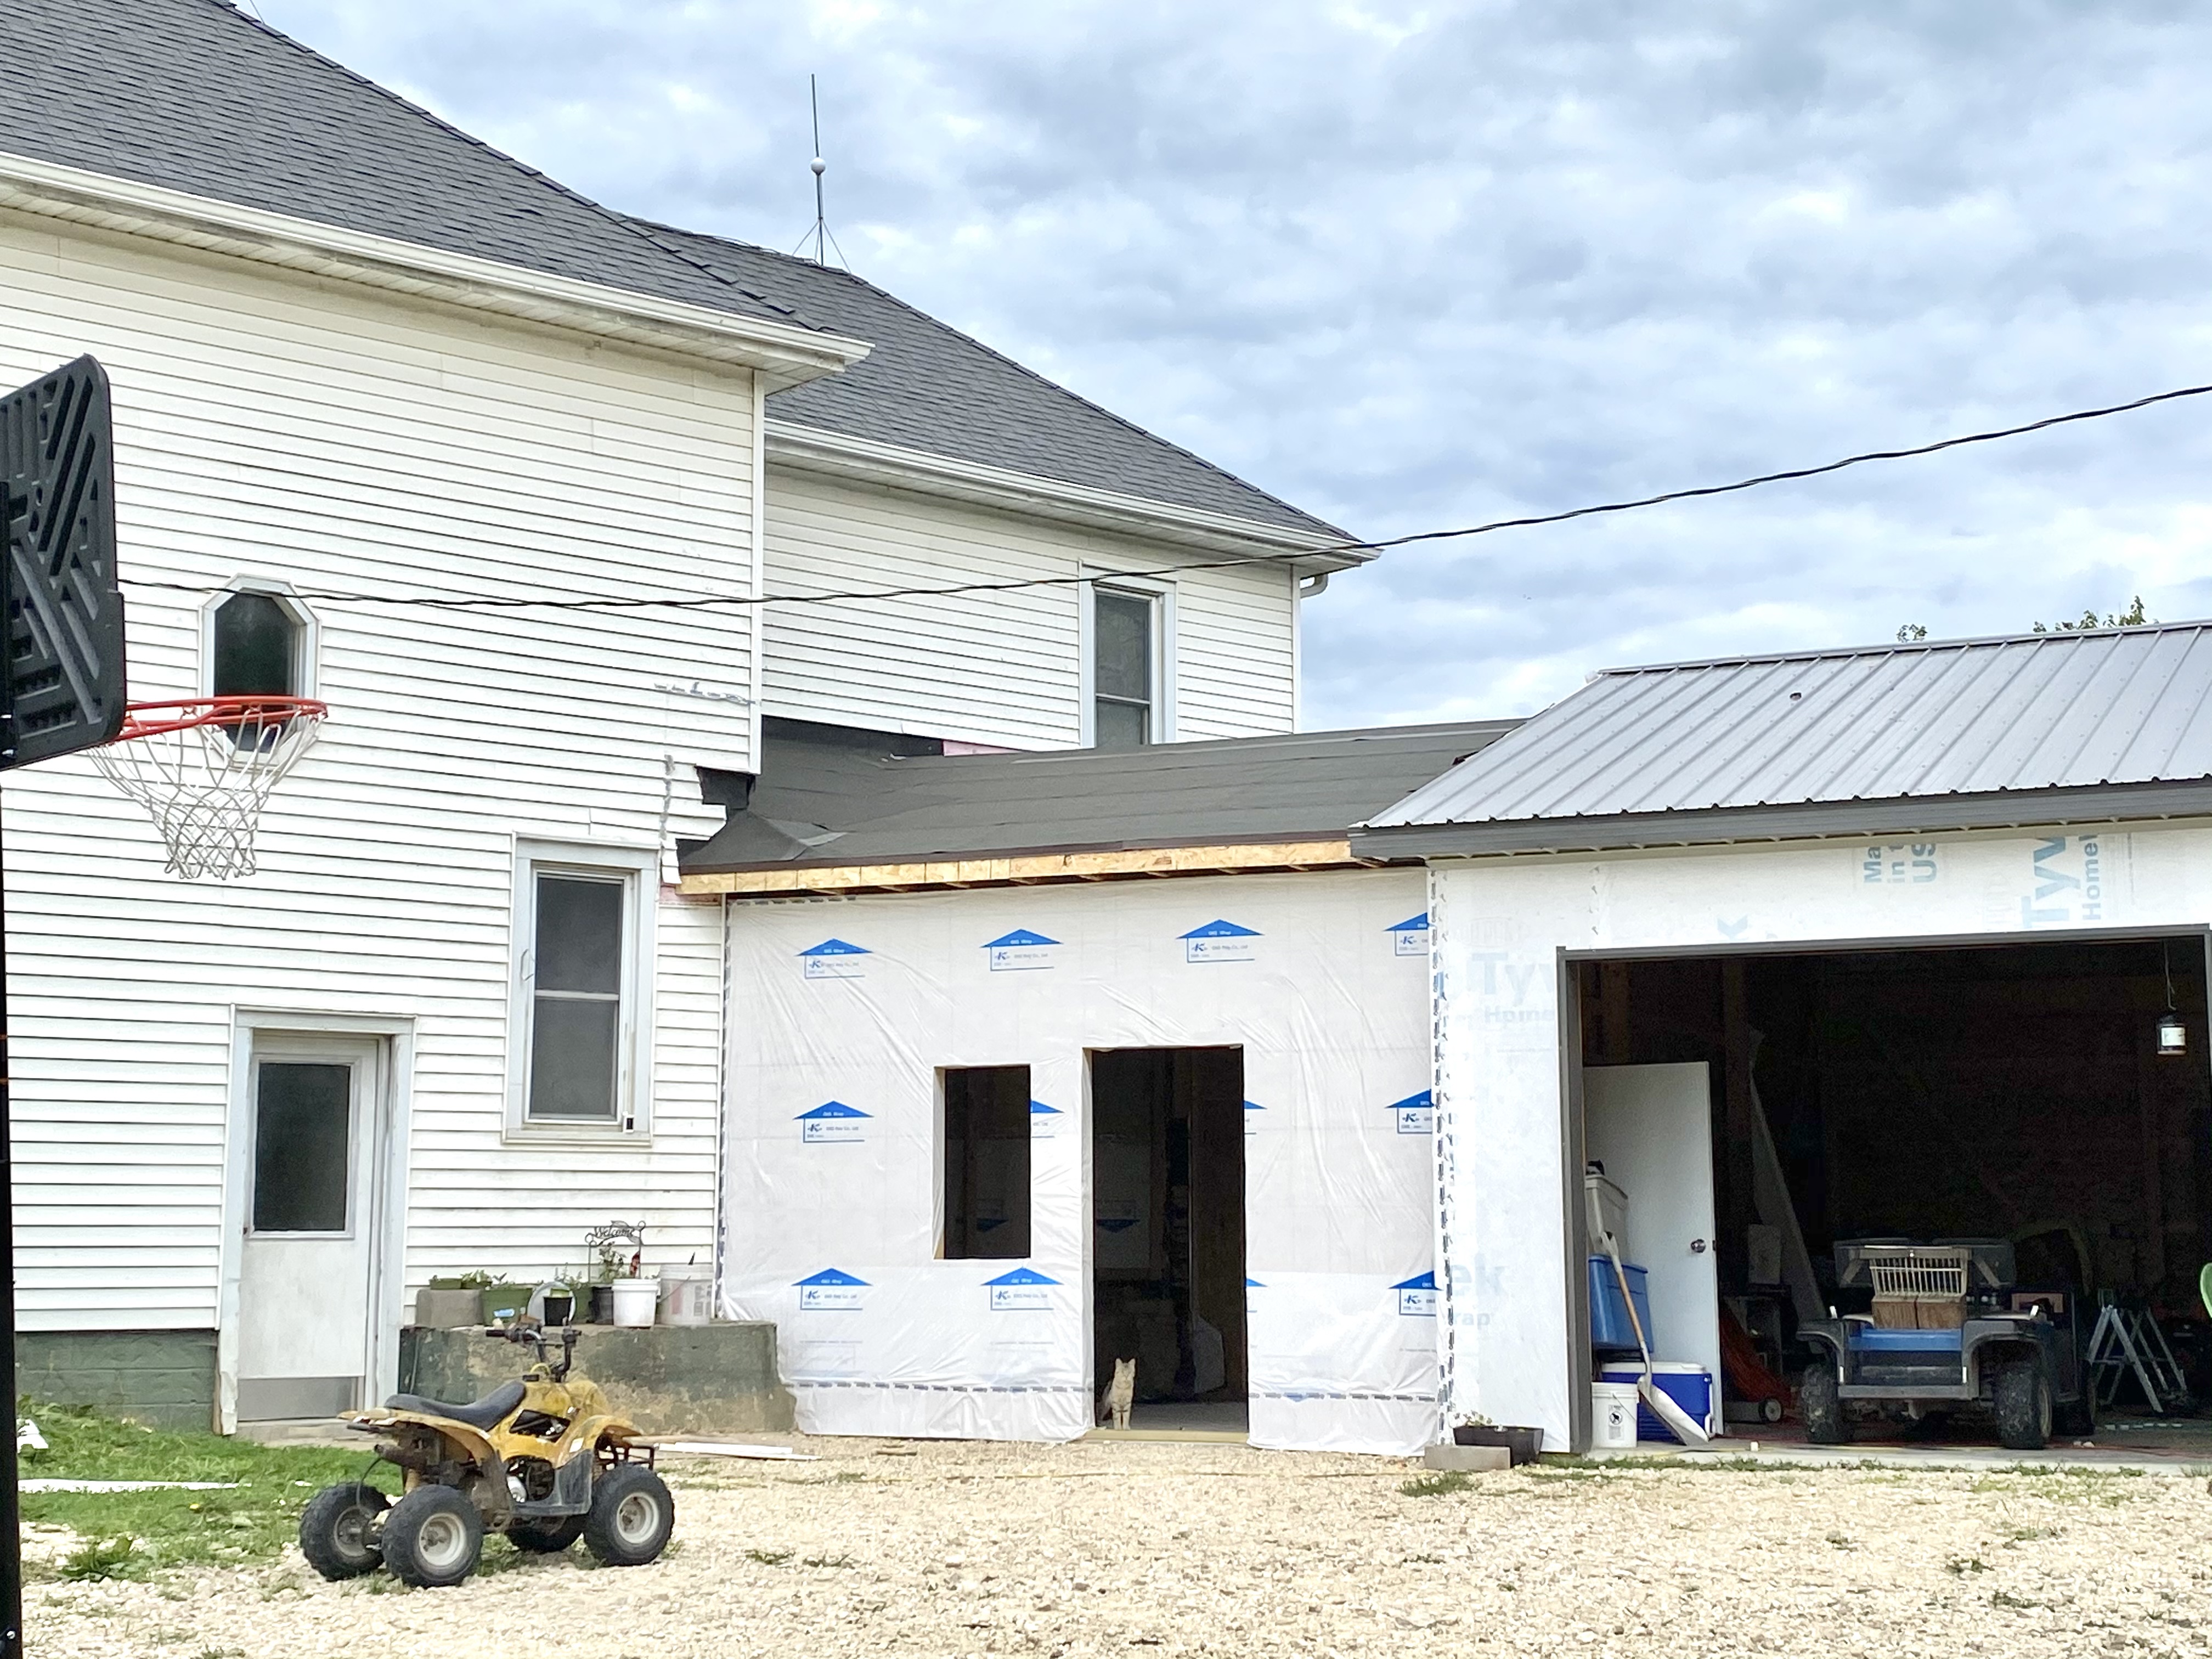
Once the concrete cured, we were able to start framing the covered breezeway. We had already picked out the windows and doors (which was necessary to correctly frame them out), and designed the floor plan of the mud room.

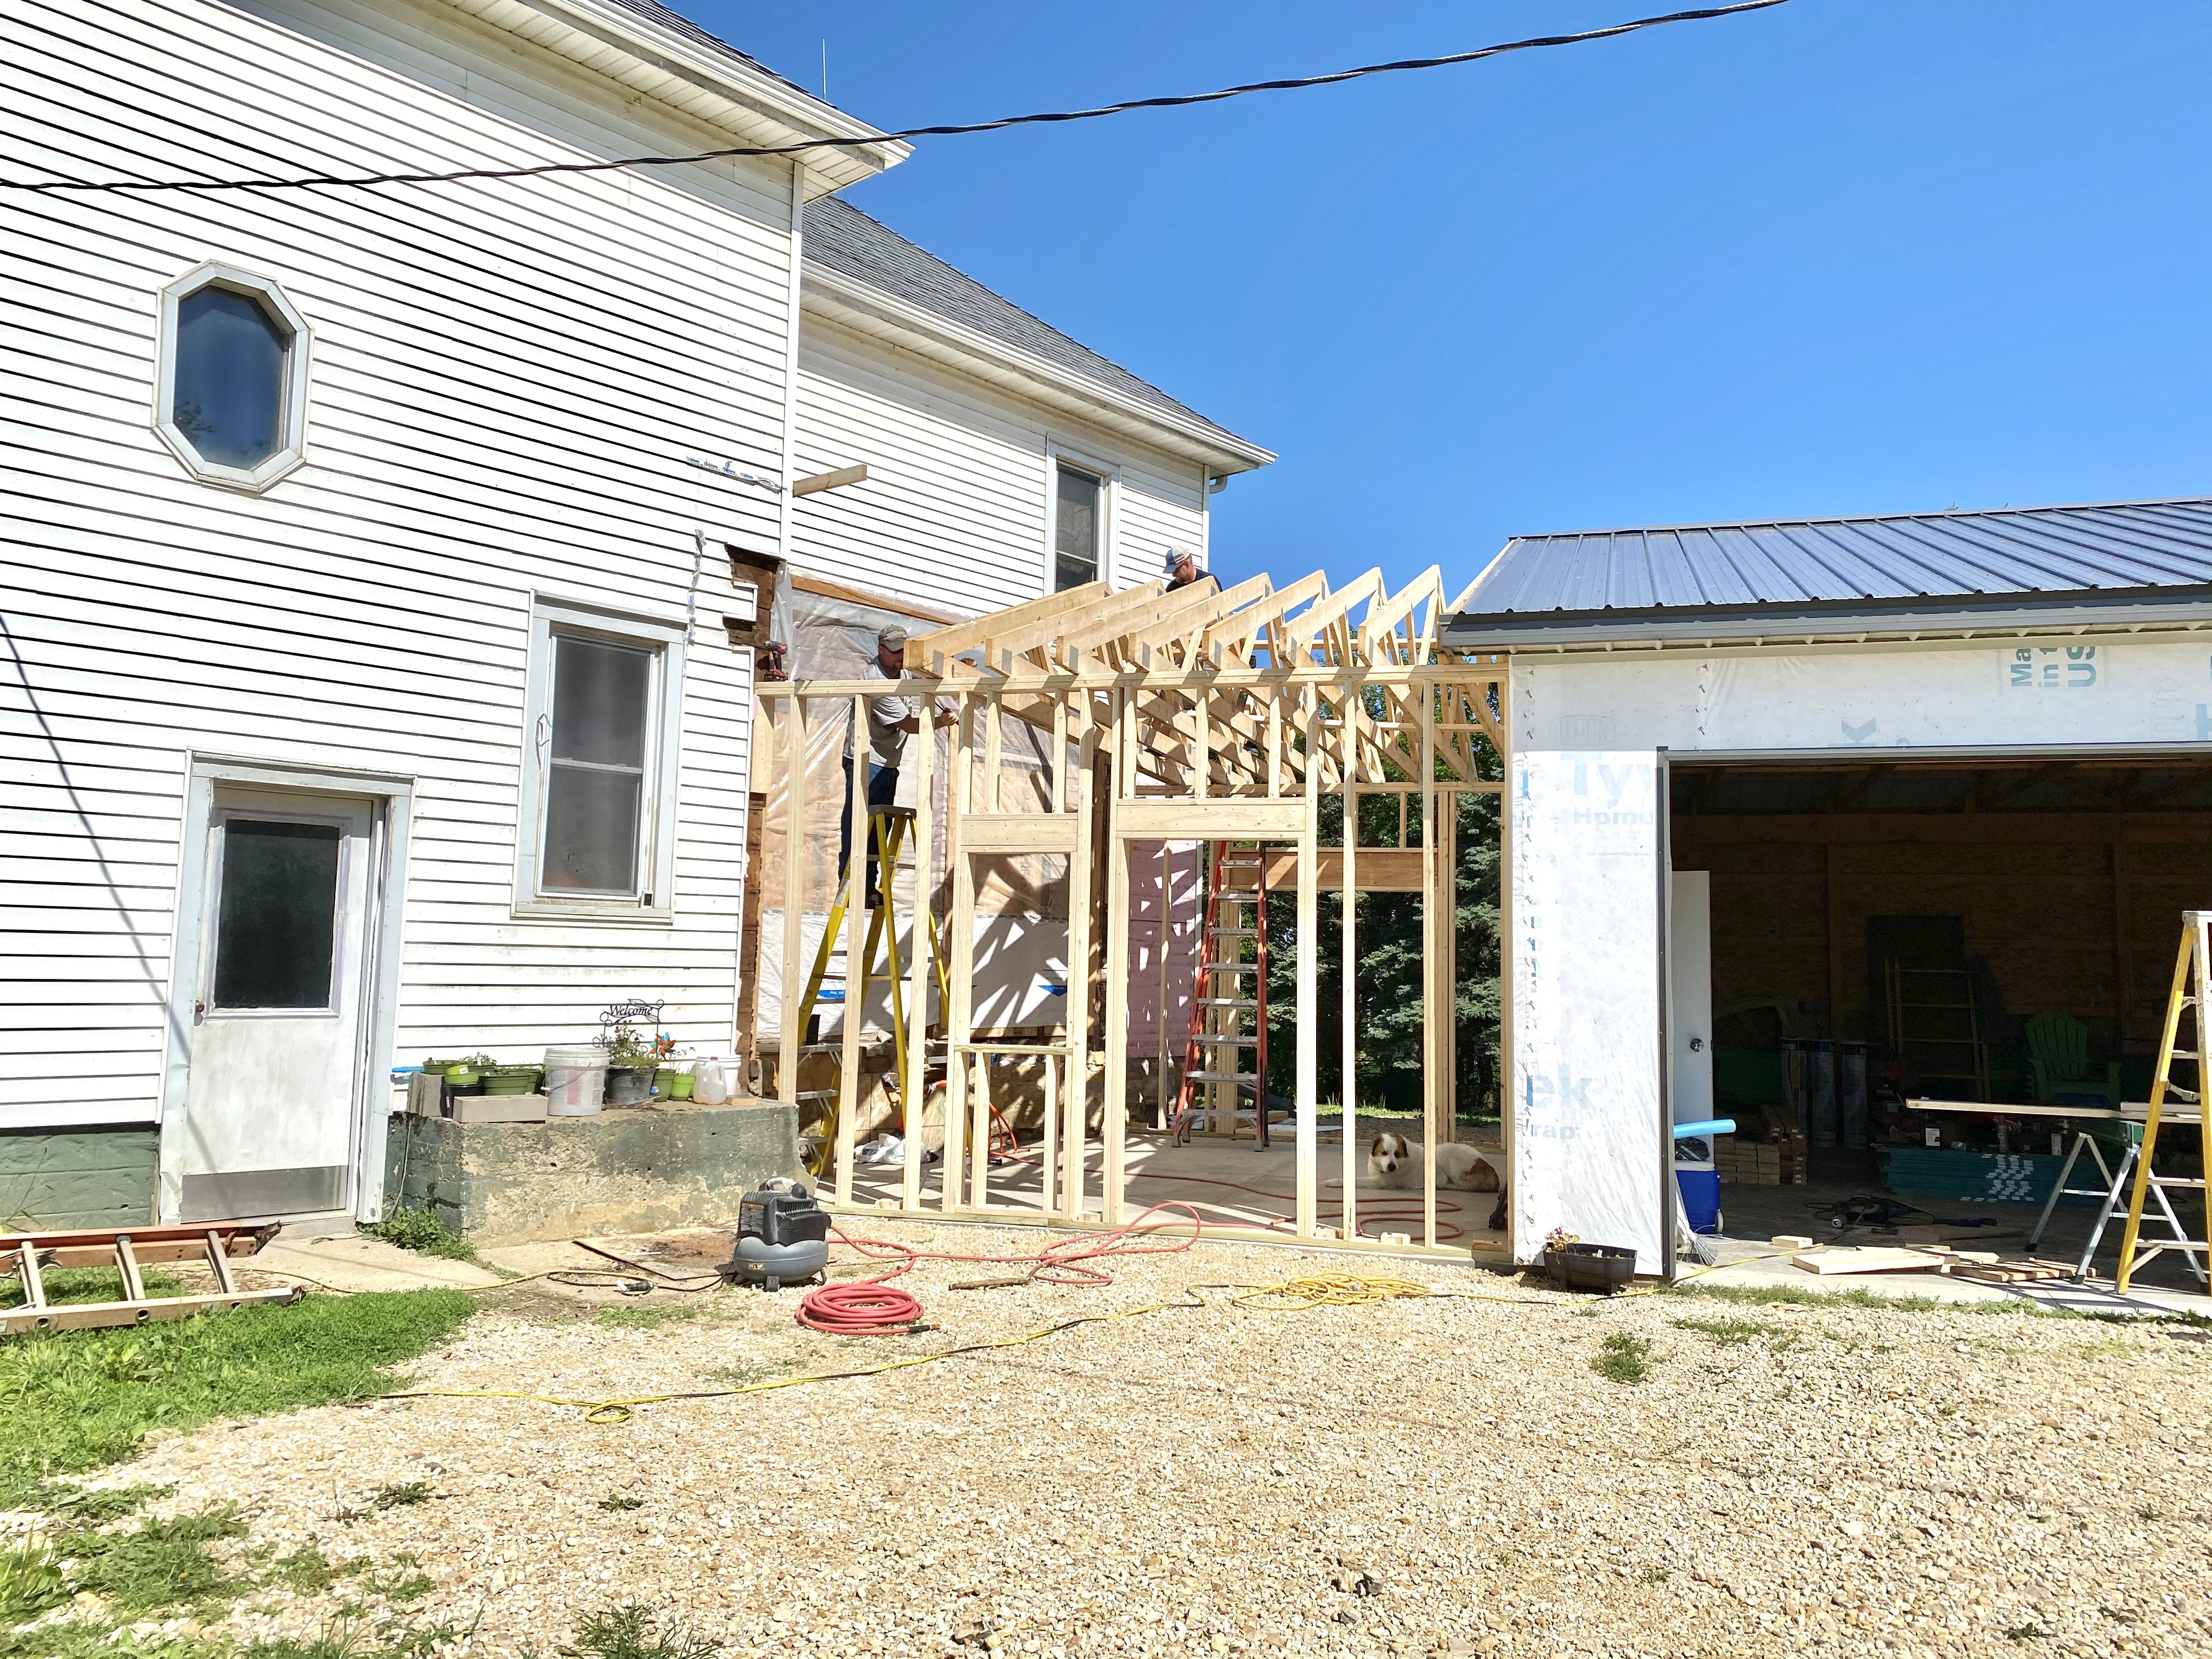
It was a challenge designing the floor plan, as the garage is angled from the house, the foundation wall stuck out further than the house frame, and the house had a bump-out we had to take into consideration when designing the roof.
Framing the Walls and Roof
Once the framing was complete, the trusses were hung, and the plywood OSB walls went up. The covered area began to feel like a room. Of course, we shingled the newly enclosed space on the hottest day of the year. It was worth it to see the progress of the mudroom between the garage addition and house.
I am very thankful we chose a simple gable roof, otherwise we might still be roofing. We chose asphalt shingle roofing due to the average cost, and the fact that it is easier to walk on than metal roofing. Metal roofing is very slippery, especially on our dusty gravel road. If we ever needed to get to the roof of the main house (about 20′ high with a very steep pitch), we have easy access to crawl out the master bedroom window with a 6′ ladder (ask me how I know).
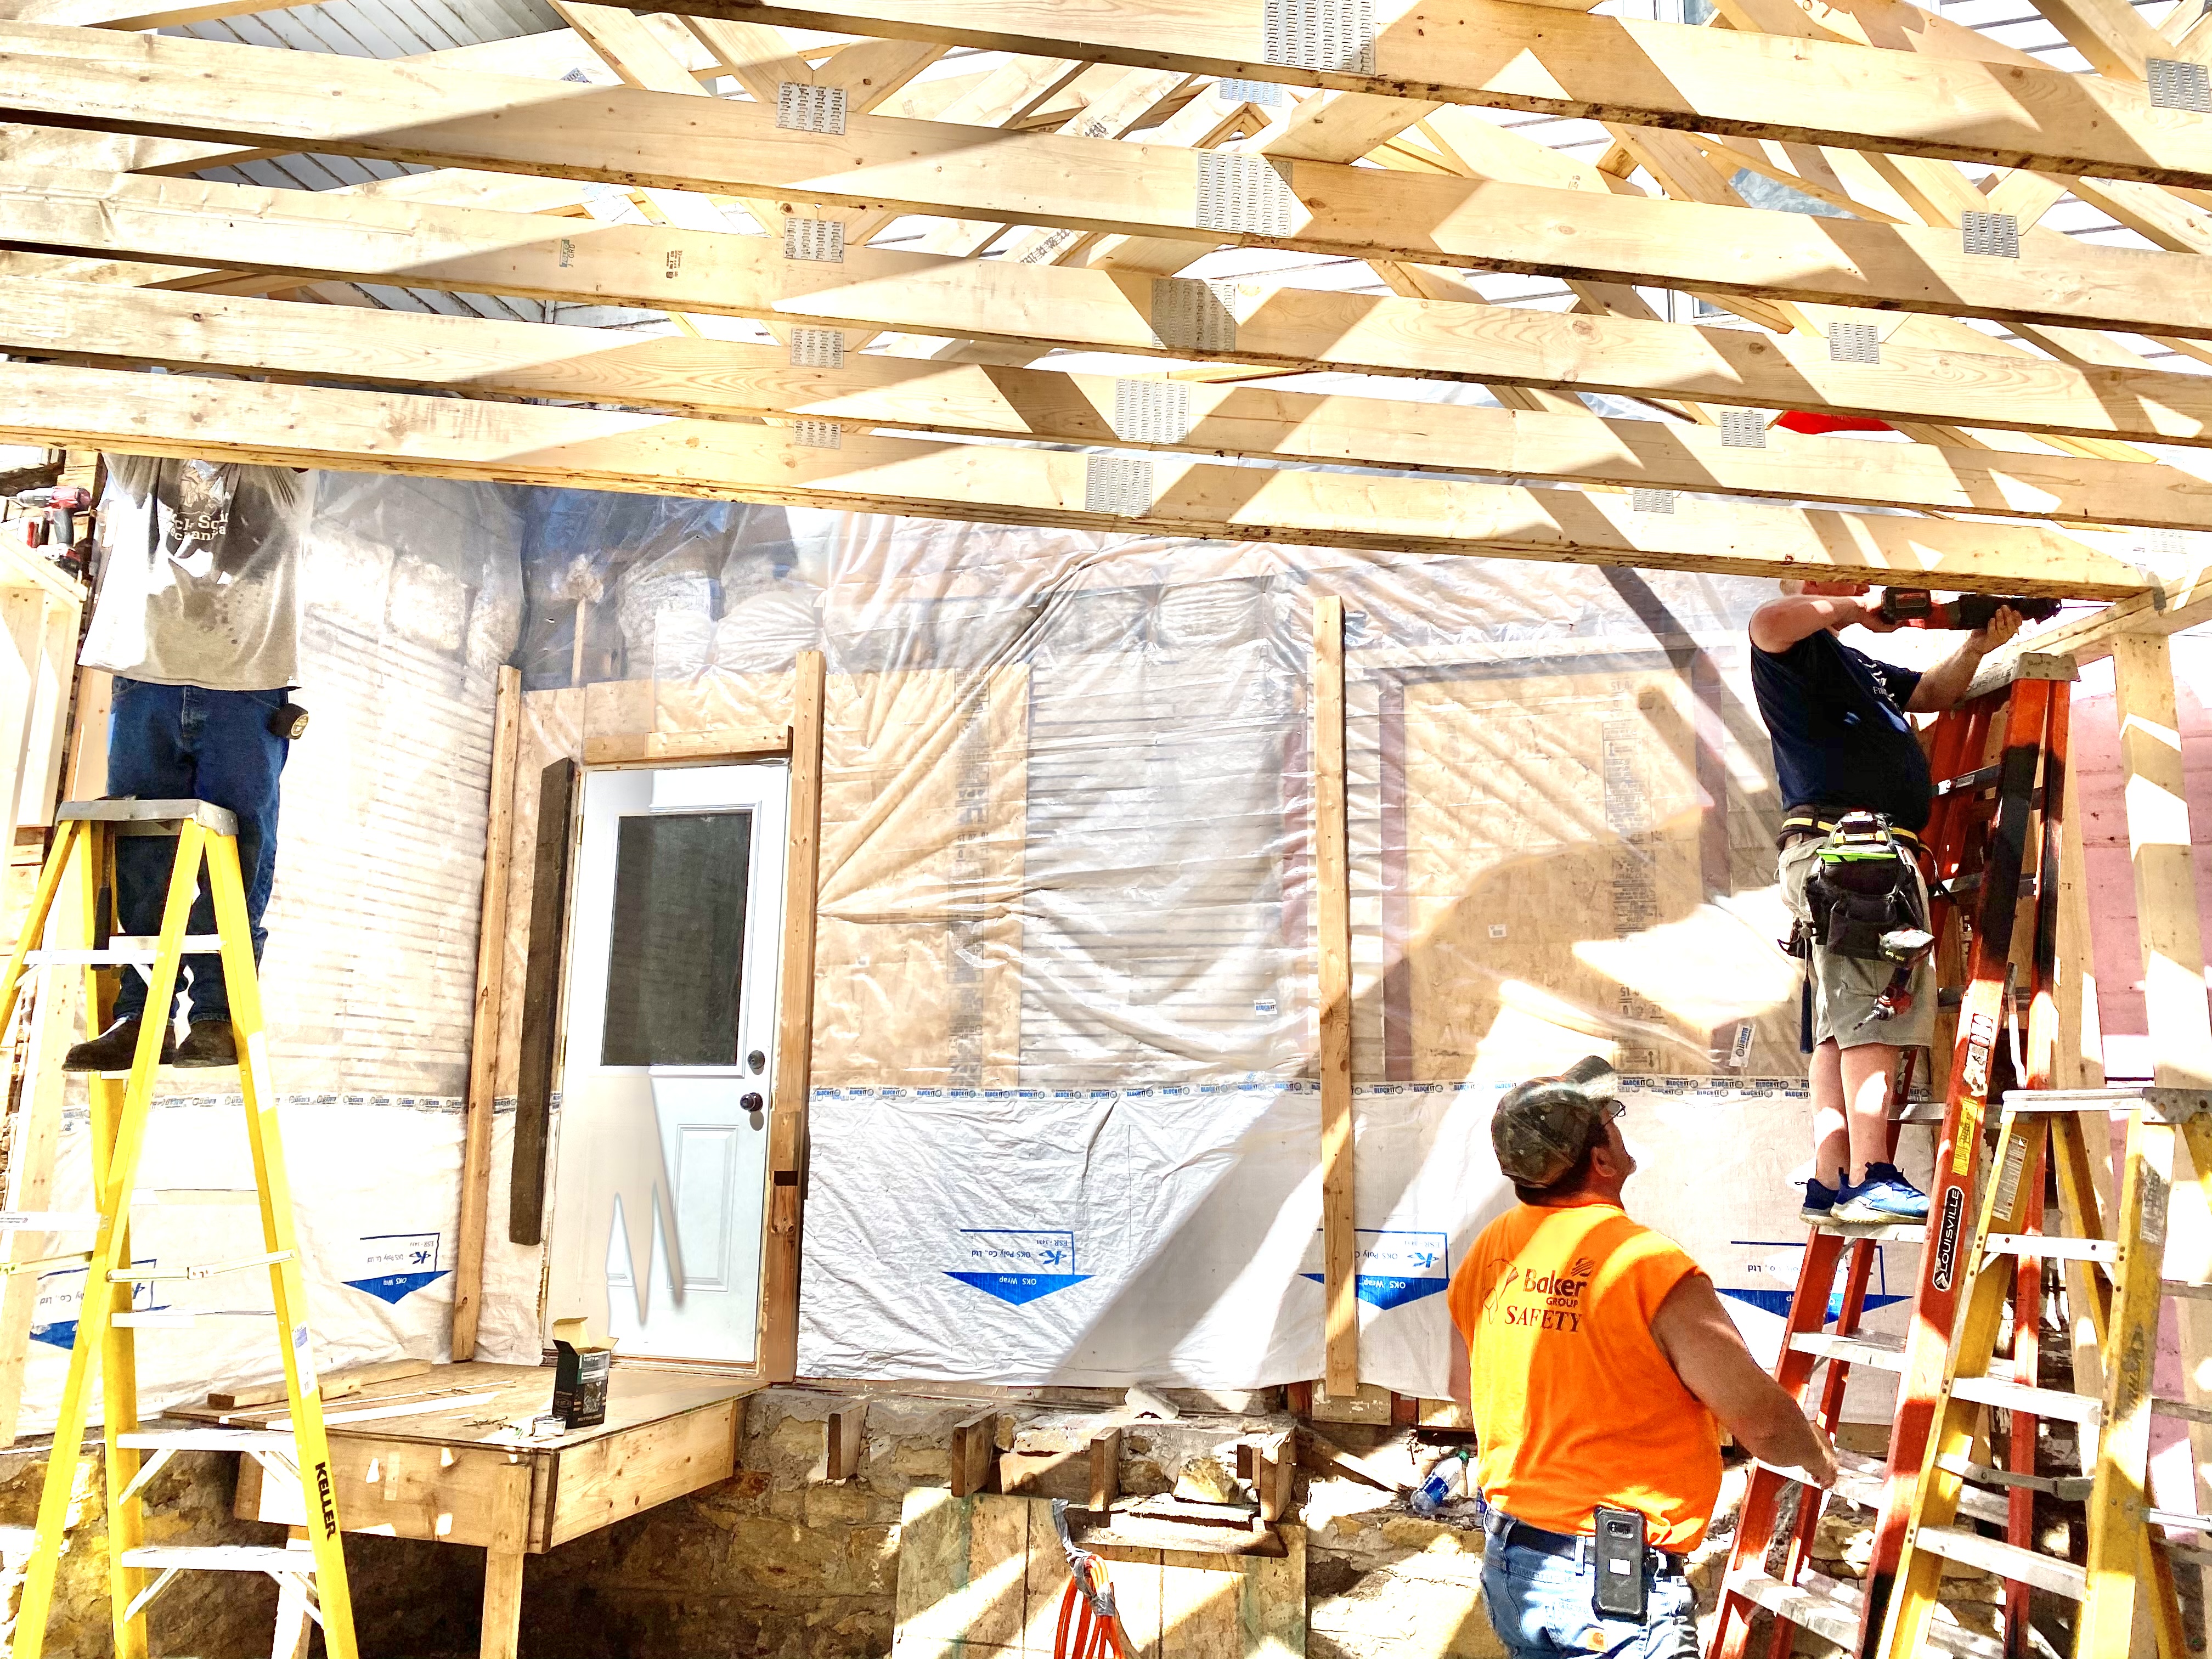
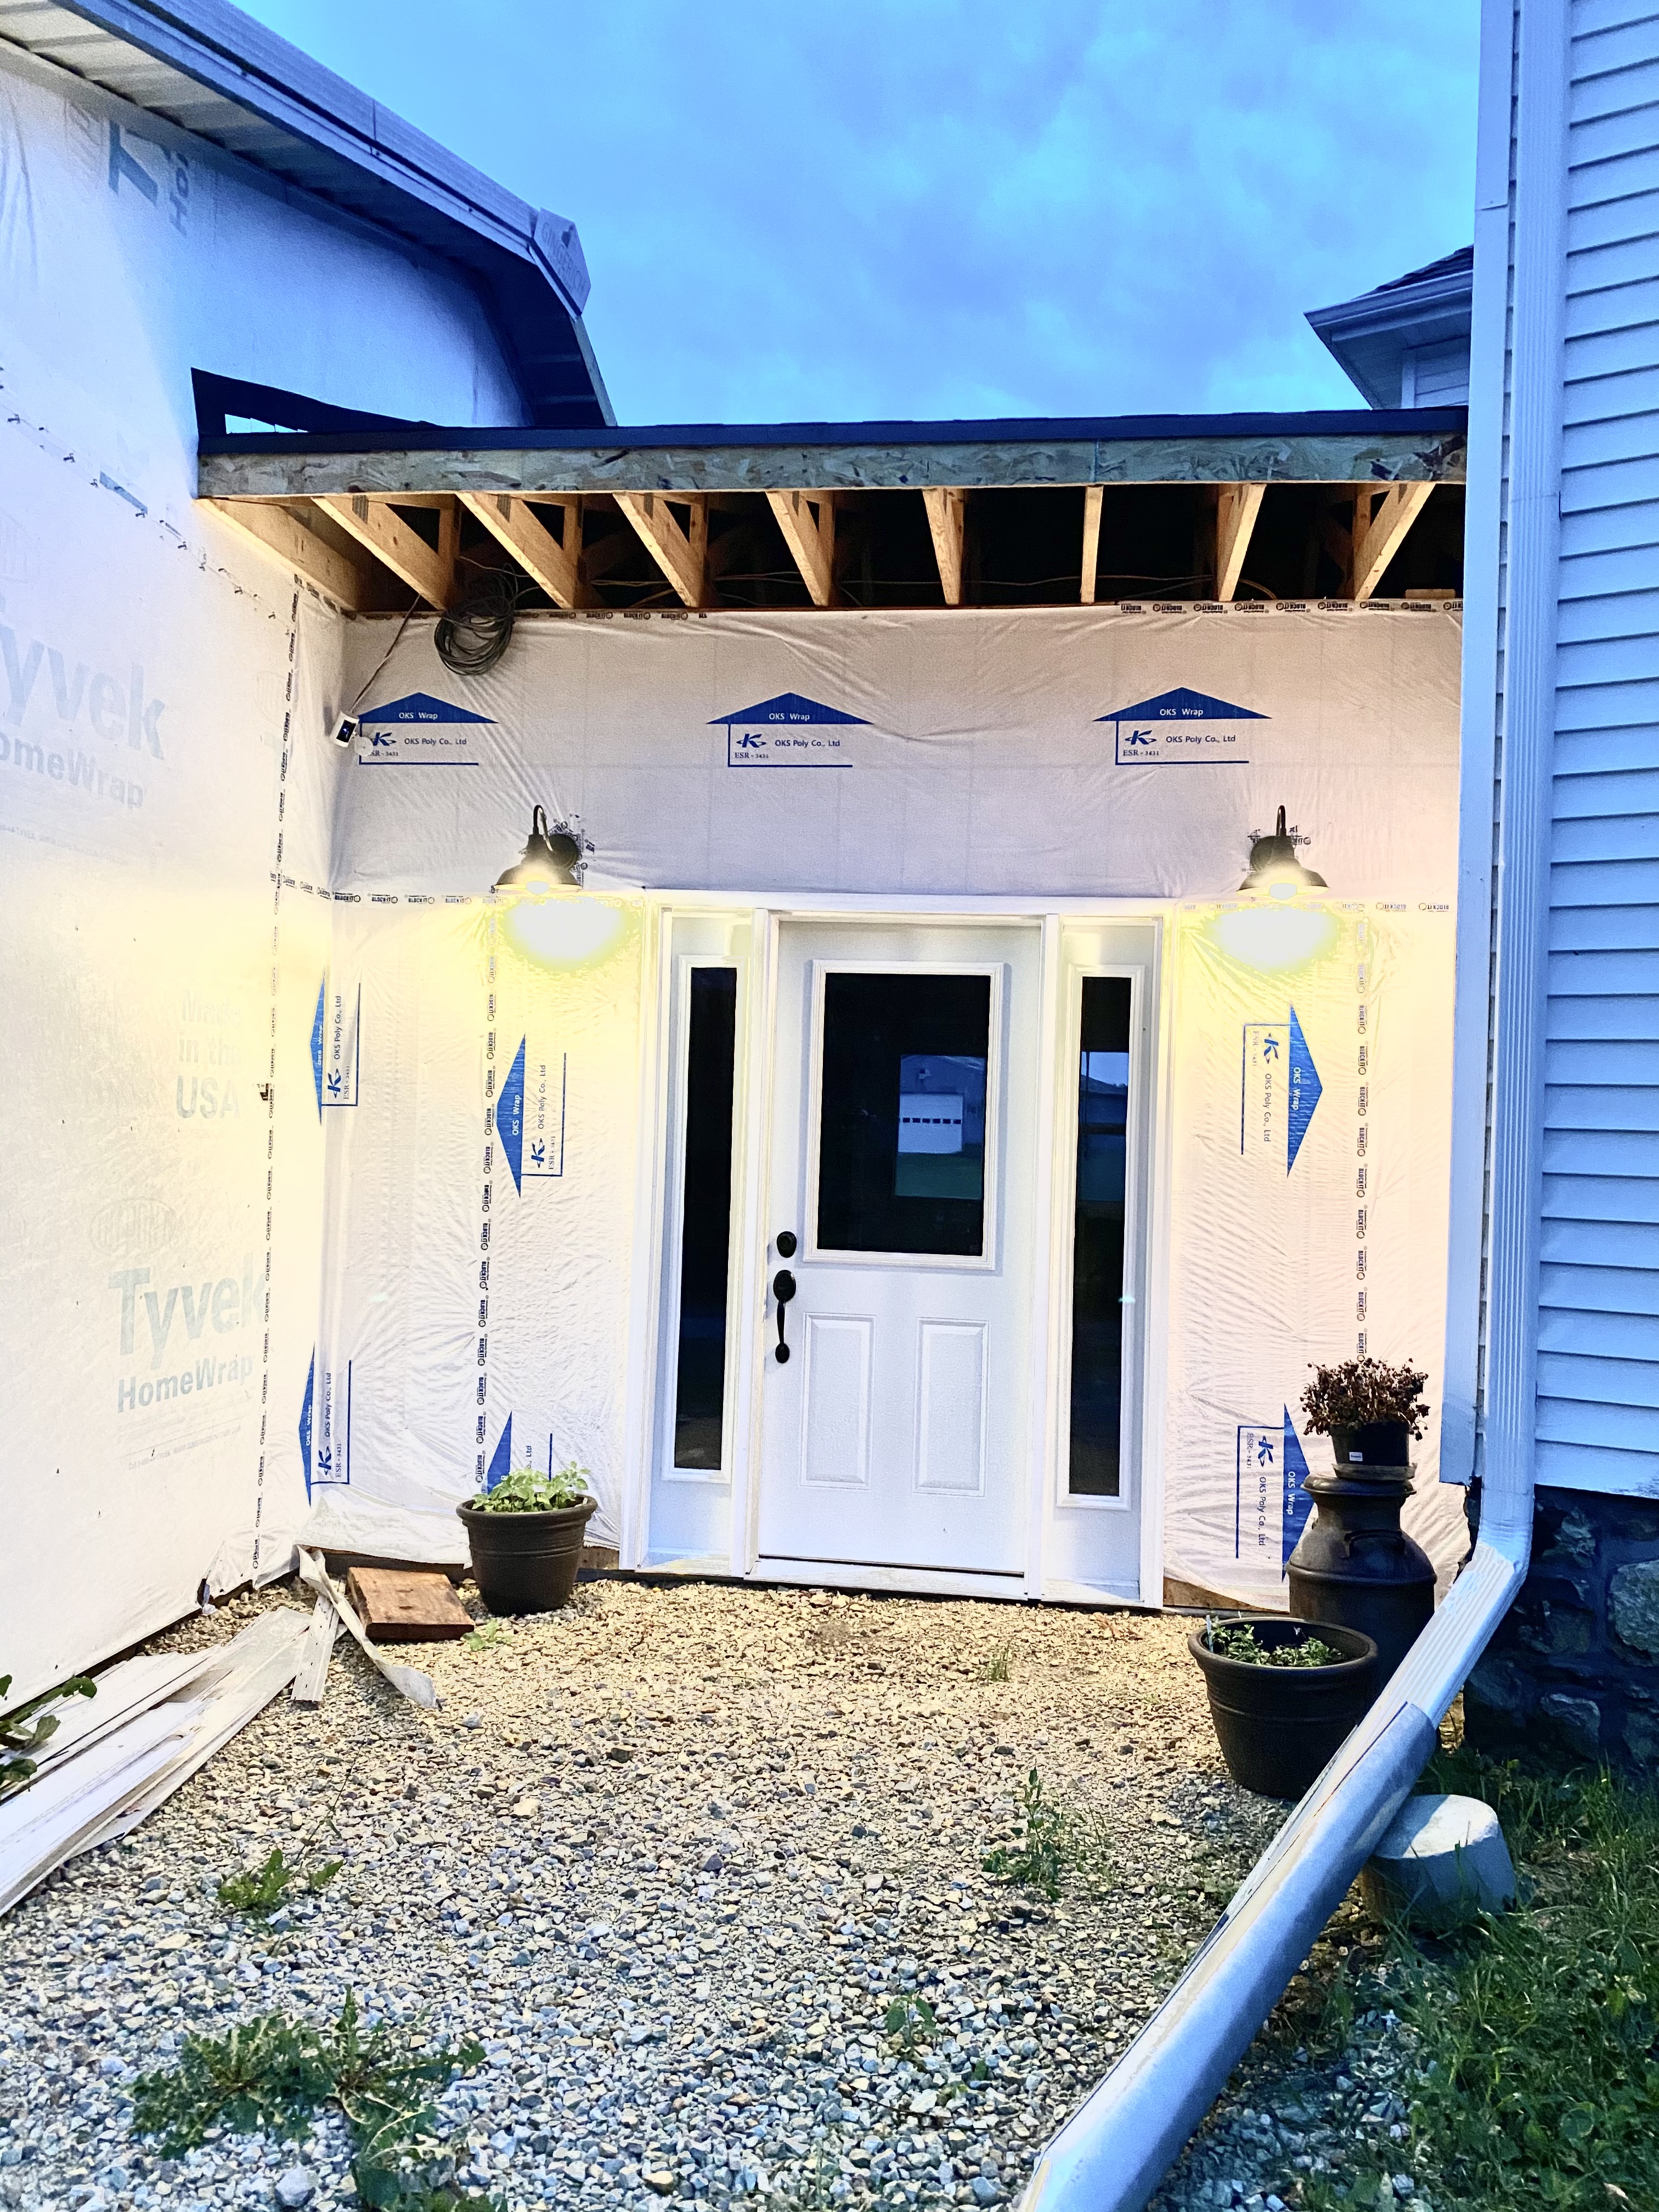
Installing the Windows and Doors
After throwing up some Tyvek house wrap, we were able to install the windows and doors. One trick we have learned over the years is to buy prehung doors. Even with correct measurements, replacing a door without the jam is a PAIN! It is worth spending the extra $50 for a prehung, and save days of adjusting (and all the frustration) to get it to align correctly. Our mudroom has 4 exterior doors, and 1 closet door. The door to the garage should be fire-rated to meet most code regulations.
Electricity, Insulation, Duct, and Drywall
Once the room was dried in, we built the closet and stairs, ran electrical wire (including a 4-way switch for all 4 doors), and ran HVAC duct for heat and air conditioning. Our heat doesn’t kick on much in the winter, as we mostly heat with our wood stove. The air conditioning ducted in the warmer months of summer is really nice, especially since the garage beer fridge is located in the mudroom.
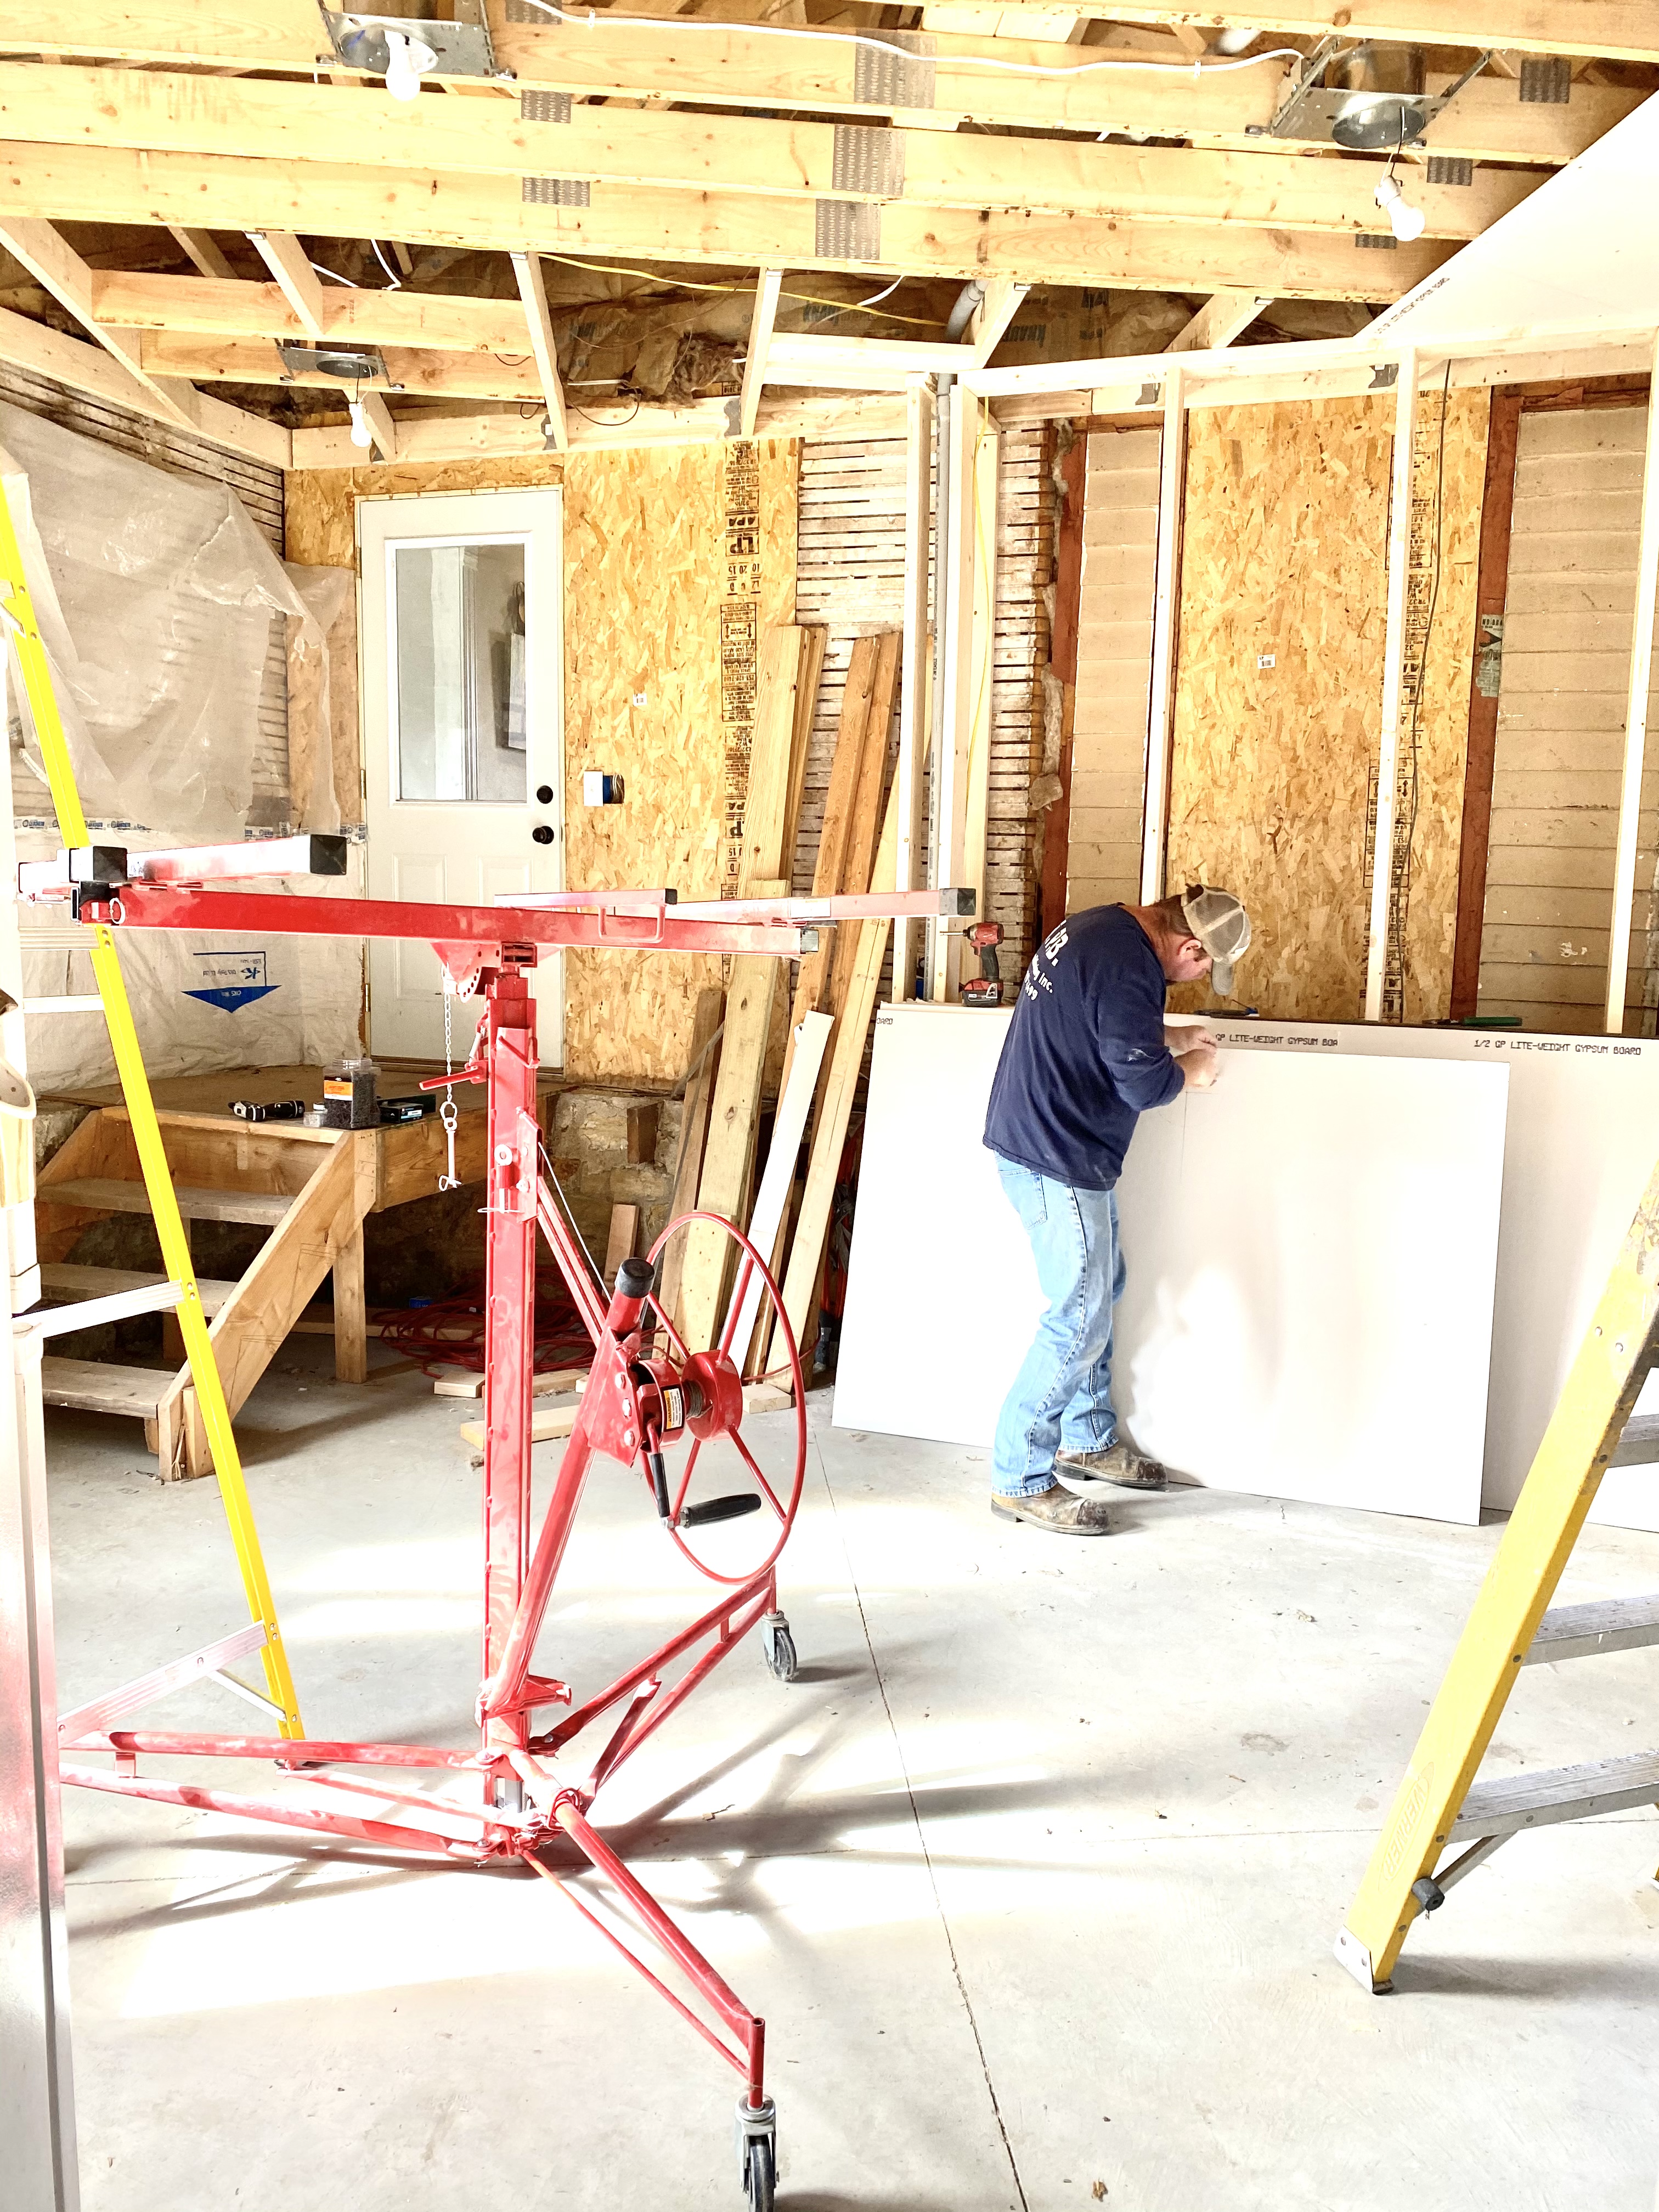
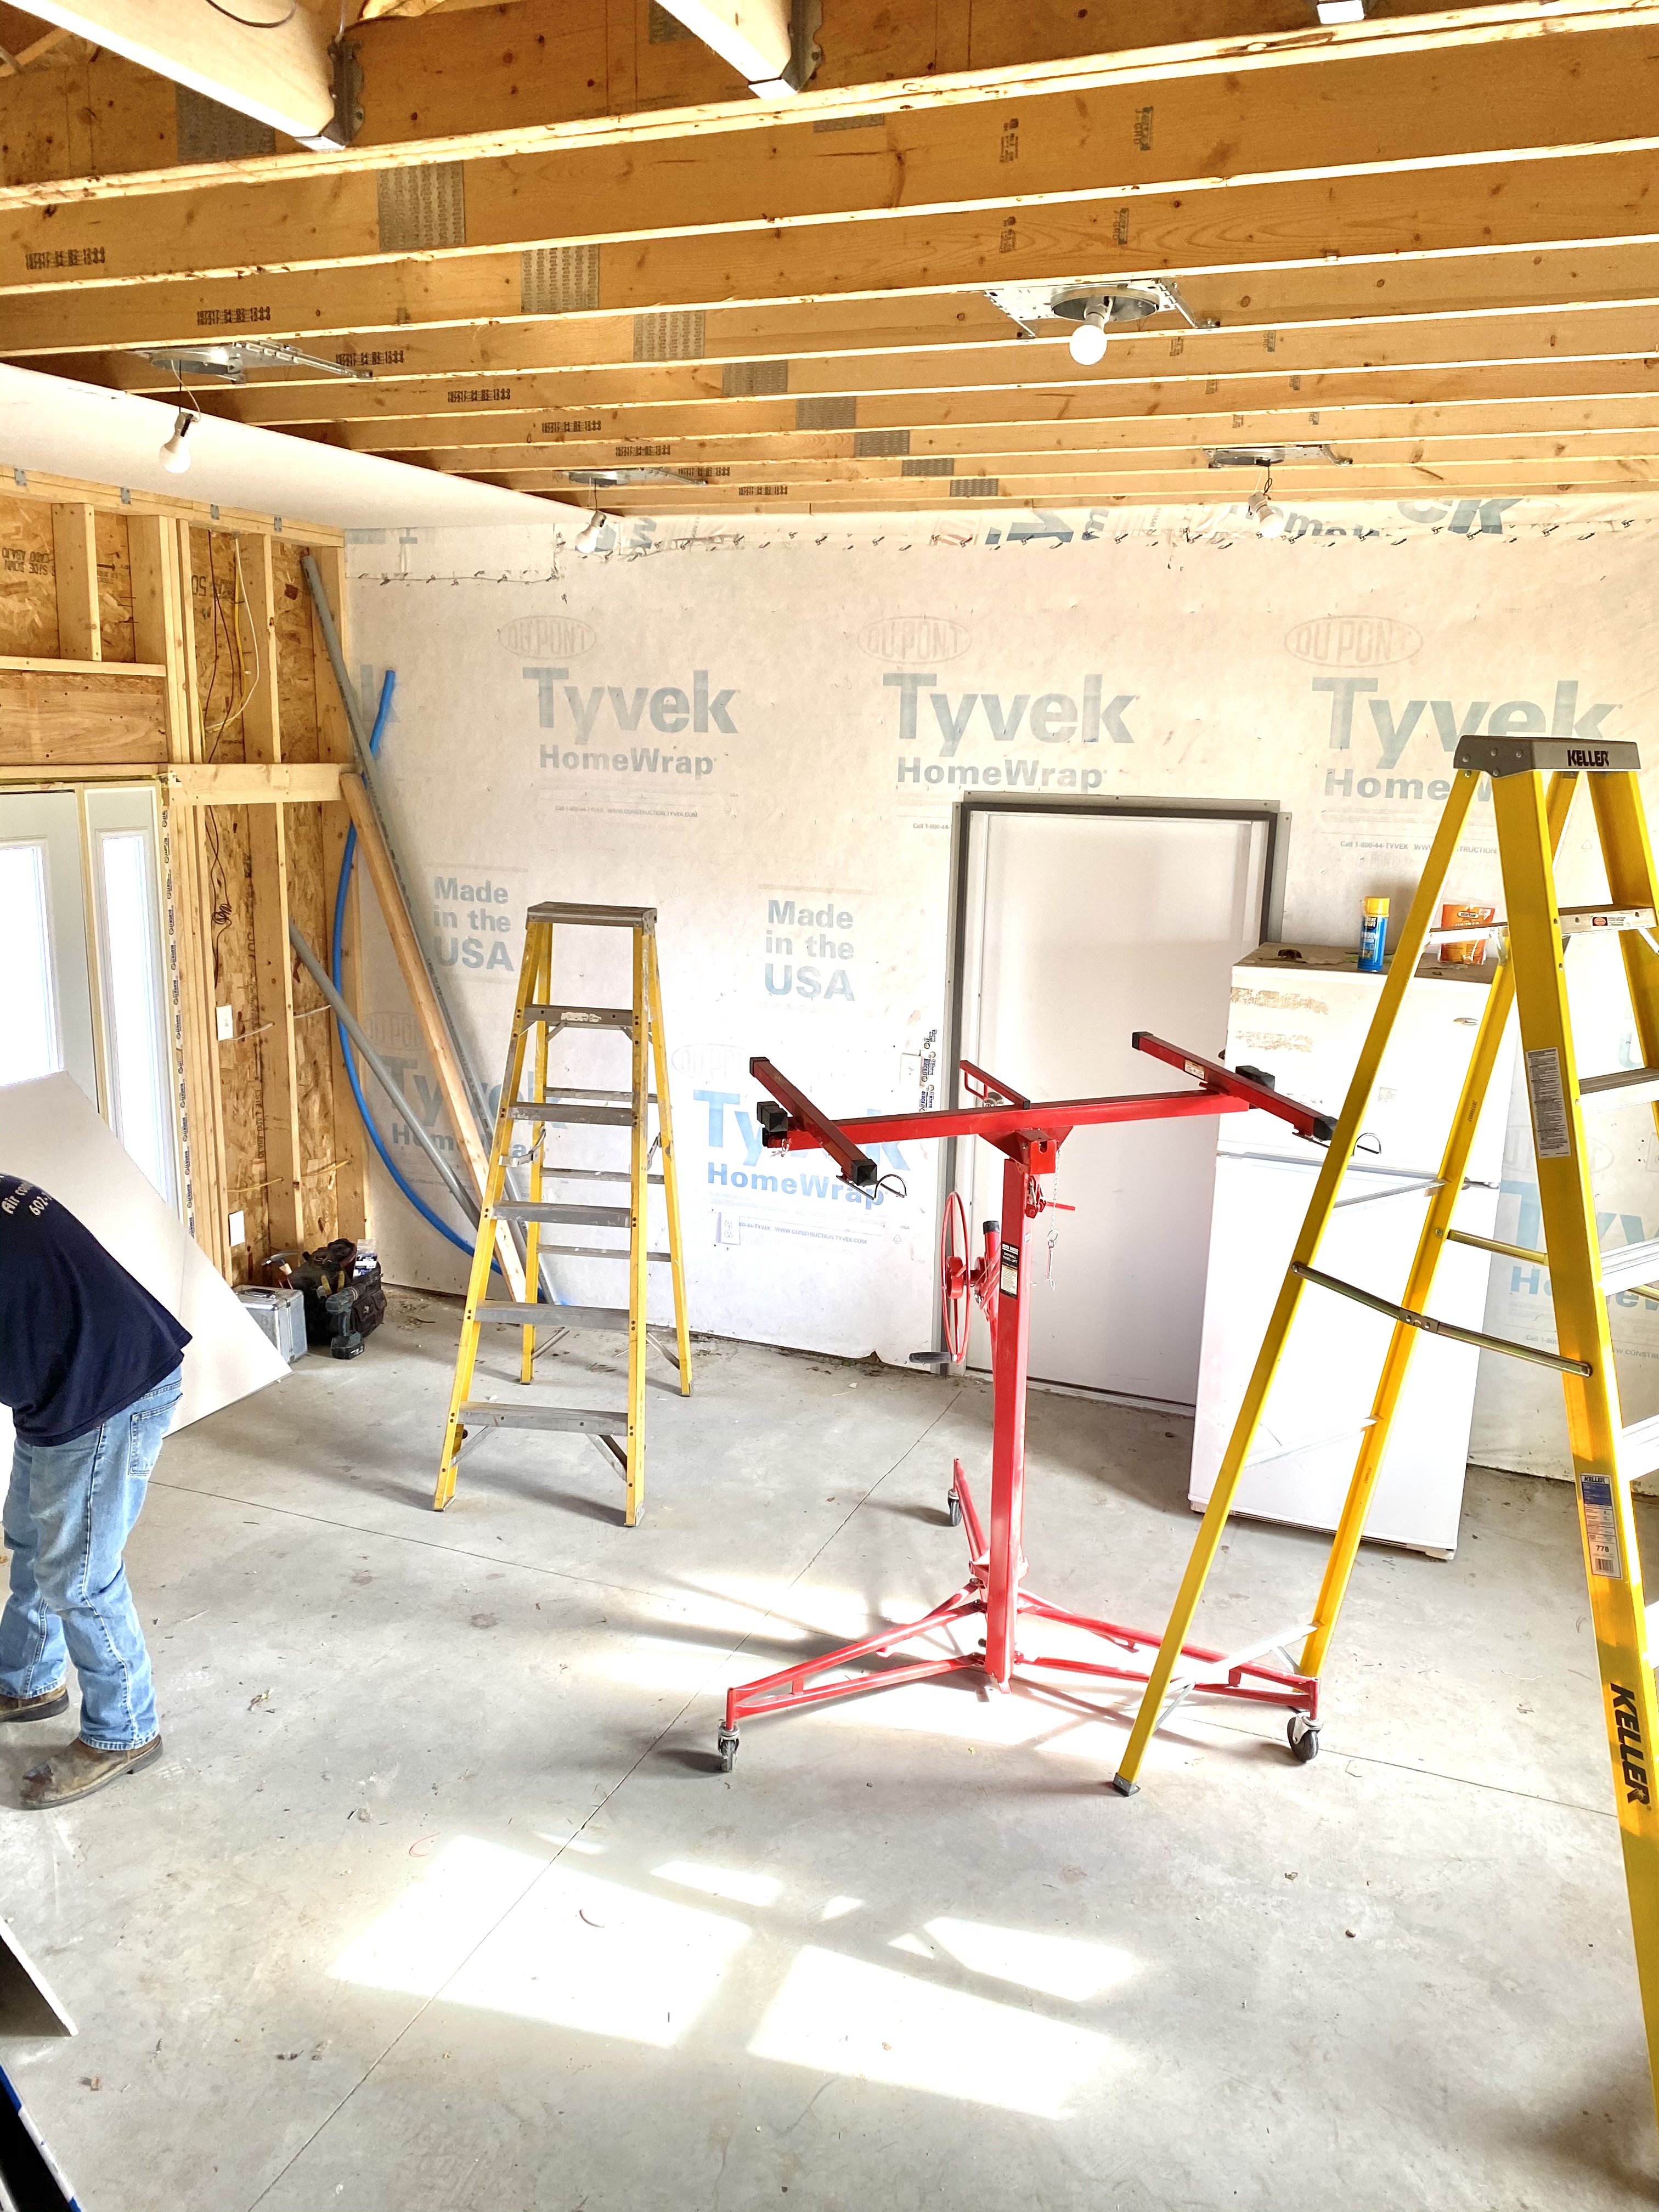
Once this was done, we could start insulating and hanging drywall. I highly recommend getting a drywall lift to do the ceilings, and a drywall roll lifter to keep the wall to ceiling seams tight (your baseboards will cover the gaps by the floor).
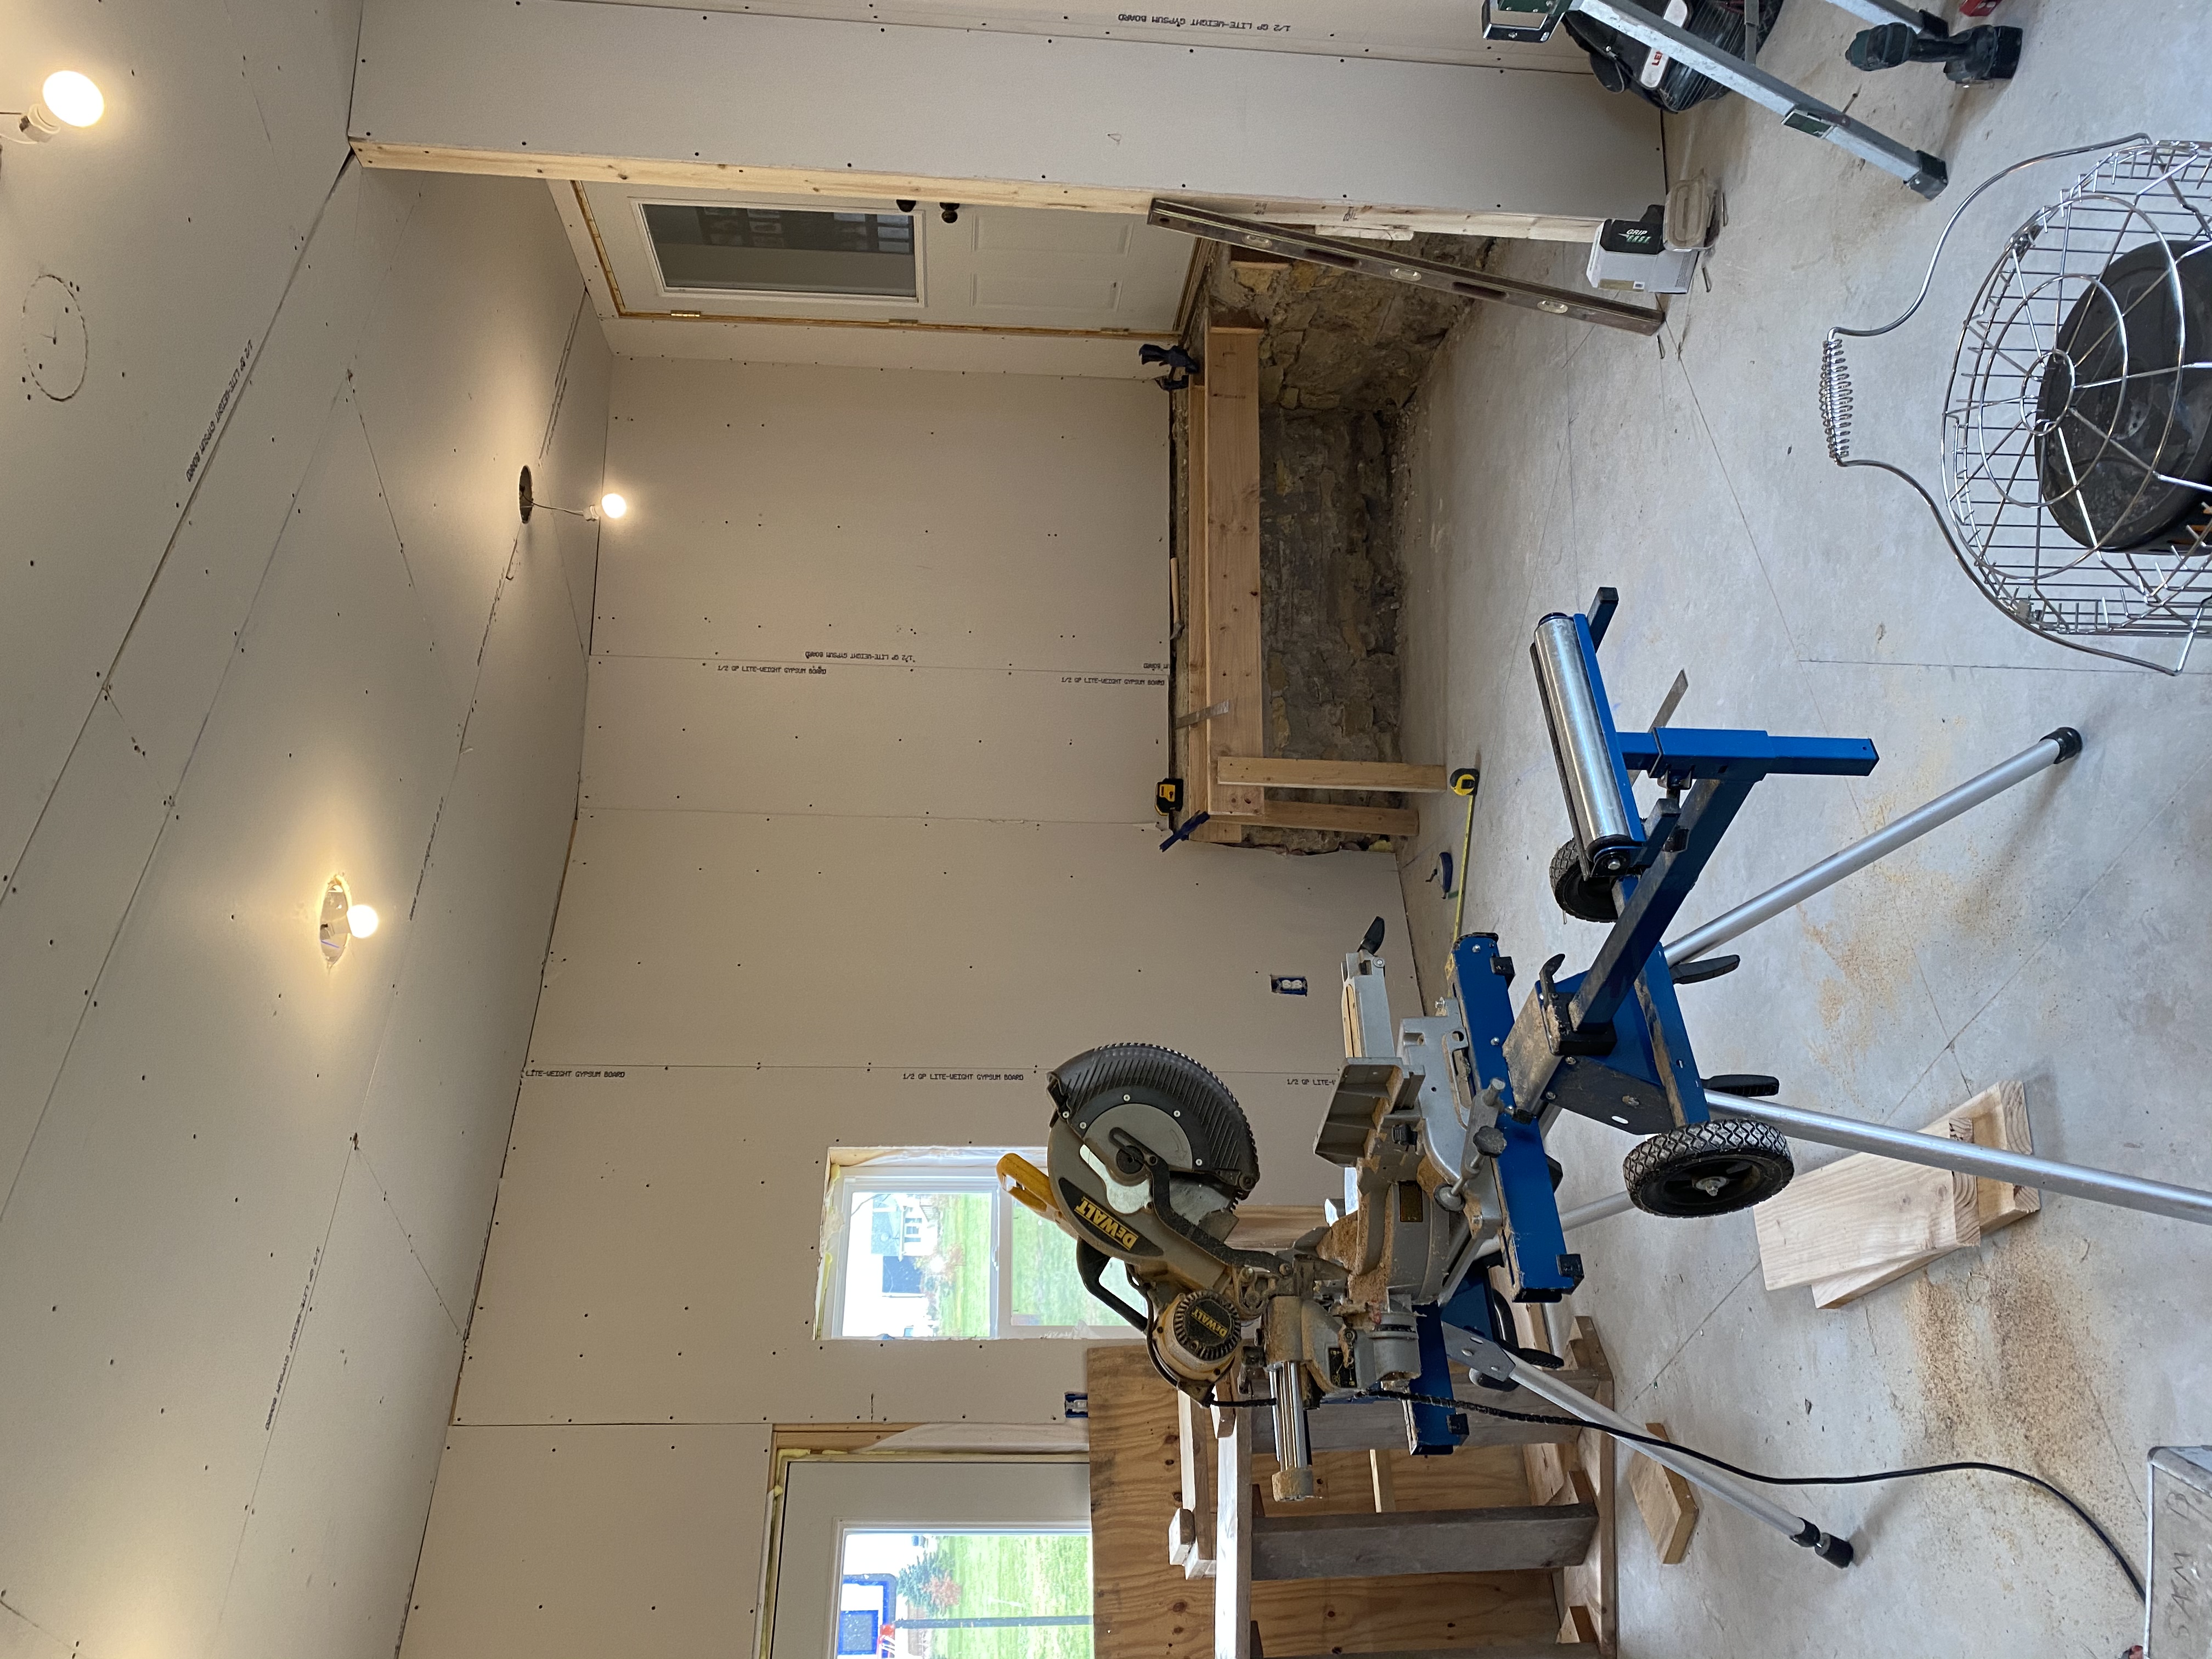
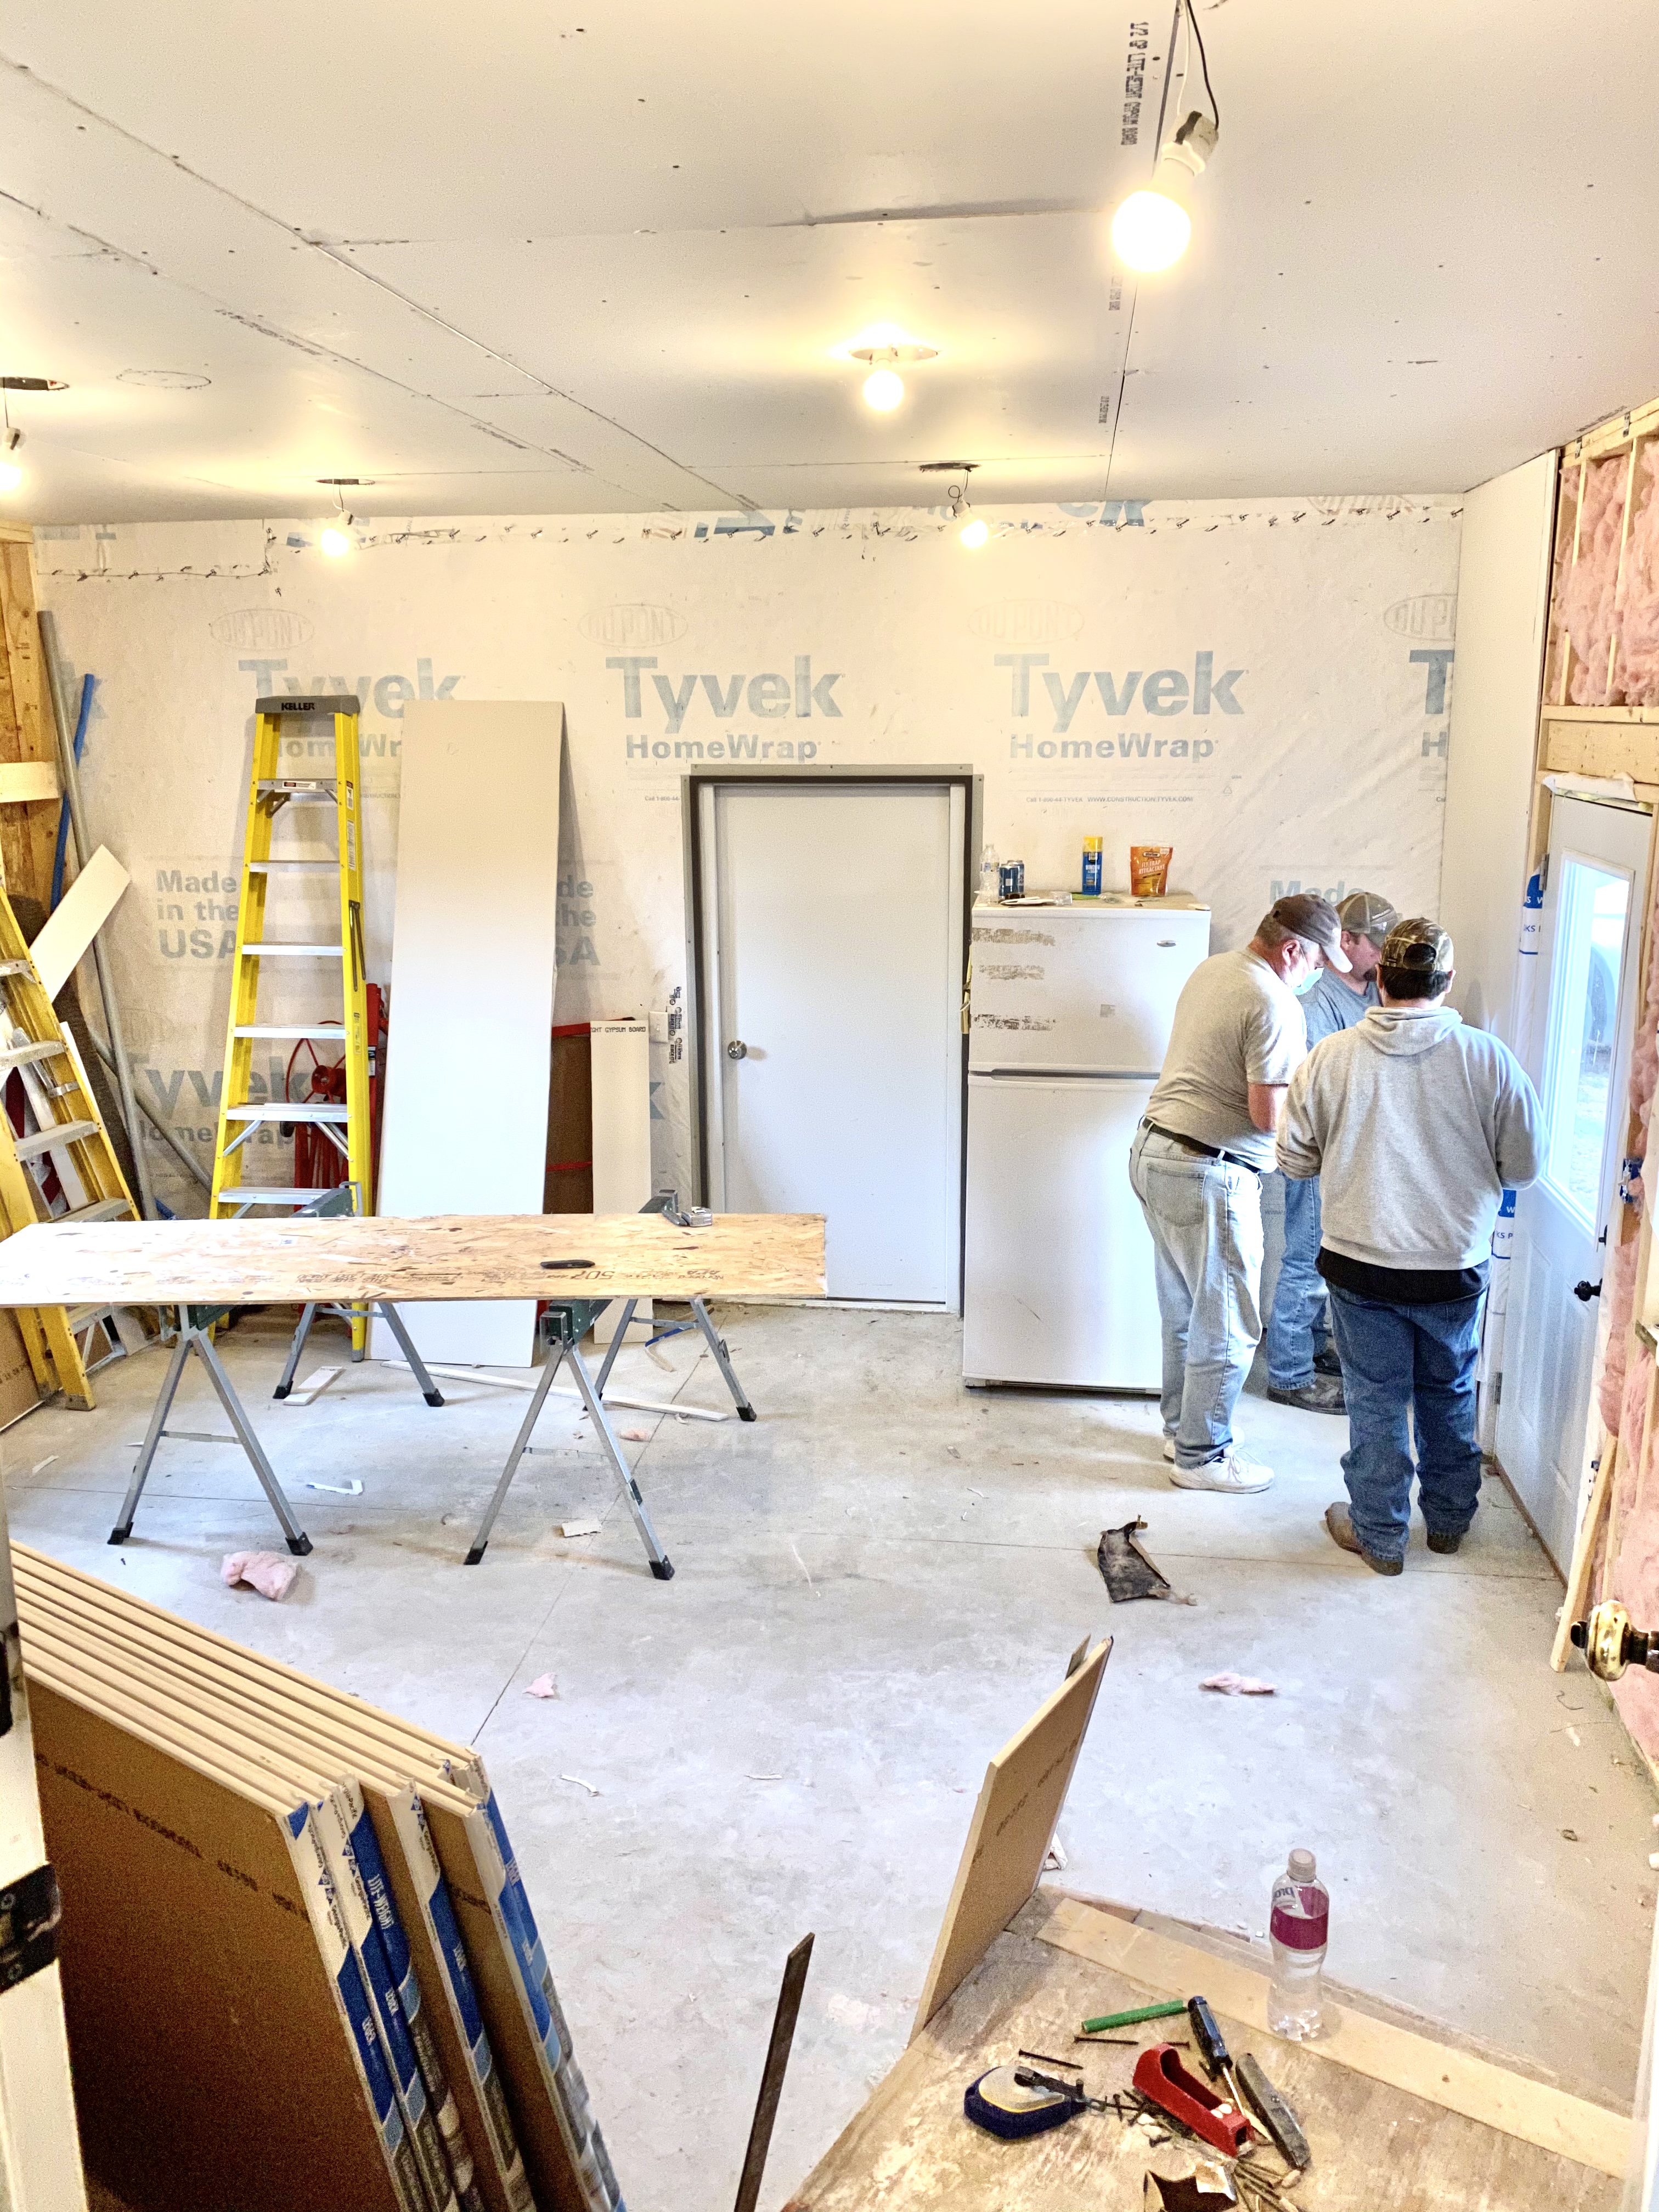
Once the drywall was hung, we were on to the dreaded project of mudding and sanding. Luckily, this room is still treated as a bonus room, and we have an exterior door to the kitchen, and the drywall dust which kept most of the drywall dust out of the house.
First Winter with the Mudroom Addition
The first winter we had the mudroom breezeway connecting the house to the garage was absolutely wonderful. Even without the finishing touches like built in hall tree, benches, shoe storage, heated floors, etc., the first year felt like we were living large! We went from parking outside, having to dig out our cars every time it snowed, and hoping our cars started (after the polar vortex killed almost every battery on our property).

While I was hoping for a southern wall full of windows to serve as additional square footage for my plants in the winter, having a door with a window and an additional little window facing south, and a door with a window with additional sidelights facing north, we have enough natural light to have the cozy outdoor feel I was hoping for (and my plants are happy). We decided not to go with full glass doors because of all the animals, the glass would be constantly dirty from all the wet noses and wouldn’t take long to get scratches.
New Build Tips
If you are building out a new house, I would strongly encourage dedicating some of your usable square footage to a mudroom. Whether you have small children, older children, no children, or furbabies, a nice mudroom is an ideal choice as an entryway to your home. My personal opinion is that a mudroom is a bit more welcoming than a formal entryway. I also feel like an entry next to the kitchen is also welcoming, as I feel more comfortable to pull up a chair at an island to visit, than in a living room. Having a small half bath near the entry is also nice.
New Addition Tips
If you already own a home and are looking to build a mudroom addition or breezeway addition, I will be the first to say that it is definitely worth the cost. Of course, it is easier for me to say this than the average homeowner because we were able to do the work ourselves, which saved us a lot in costs. Most contractors understand that homeowners want to renovate their homes on a budget, and many contractors are willing to work with you to allow you do partially DIY to save money. My suggestion is to get the quote with the complete build, and the quote with the partial DIY. You can then decide how much work you want to do, depending on how much you’ll spend. All in all, a mudroom is a great addition that usually adds to your home value. And our little room addition is one of the hardest working rooms in our house, second only to the kitchen.