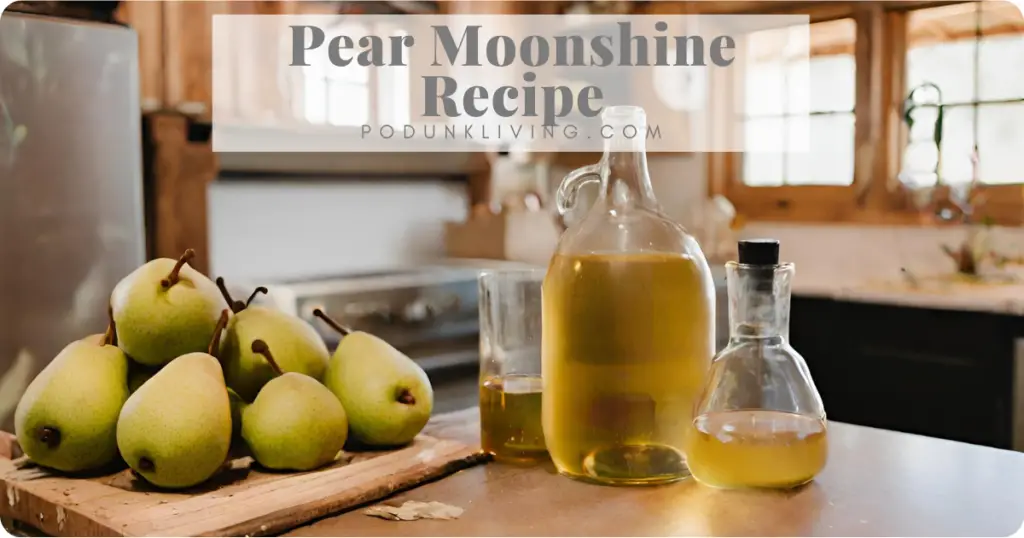
Pear Wine Recipe
Transforming pears into Pear Wine, can be an exciting quest that you embark on… without leaving your backyard. Harvesting pears is a bit pear-anormal, because they are one of the few fruits that should be picked from the tree BEFORE they are ripe. It’s like dealing with teenage fruit – they want to leave the tree, but they’re not fully ready just yet. However, once you’ve successfully snatched these premature pears, the real pear-anormal activity begins. They sit on the counter, playing mind games with you as you wait for them to ripen. Then all of a sudden, you’ll have 50 pounds of ripe pears staring at you in judgment, because they know they will go bad before you have a chance to do anything with them. It’s a pear-pressure situation, and that’s why we make the pear wine!
Homemade Pear Wine
You’ll absolutely love clinking glasses filled with a delicious craft that you made from the judgmental souls of the pear-anormal pears that you harvested. This wine is not just a beverage; it’s a triumphant salute to conquering the fruit with a diva attitude. Pear Wine makes a great gift, but remember, you’re not just gifting an adult beverage; you’re presenting them with a taste of your victory over your fruit with an attitude. It’s the kind of gift that keeps on giving, especially when the recipient realizes that their ornamental pear tree has been outclassed by your fruit-bearing backyard shenanigans.
Ingredients Needed to Make Pear Moonshine
You’ll only need a few ingredients to make this homemade pear brandy. Pears from your own pear tree, or from local farmers’ markets will work best. If you’re feeling adventurous, swipe some pears from your neighbor’s tree. If you’re forced into buying store-bought pears, remember that have preservatives applied to them that inhibit the natural yeast fermentation process. There is a solution, simply add commercial yeast to the recipe.
- Pears: Pears with high contents of sugar and water work best for homemade pear liqueur. These varieties include Bartlett, Comice, and Starkrimson. Other varieties will work, and feel free to try your favorite variety of pear! You can learn more about the health benefits of pears in this article.
- Honey: There are several health benefits to honey. Since honey is expensive, sugar could be used as a substitute (see below for instructions). Sugar also lacks the wealth of health benefits, but you’ll save a few bucks. If you’re feeling fancy, using honey will also add a bit of spice to the moonshine.
- Water: If using chlorinated water (like city tap water), let the water sit for 24 hours prior to use to allow the chlorine to evaporate. Chlorine can kill the beneficial bacteria needed for fermentation. You could also add campden tablets to your brew to counteract the chlorine.
Equipment Needed for Winemaking Recipes (Using Fresh, Ripe Pears)
There is no need to purchase expensive wine making kits for making pear wine, when all you need is a few pieces of equipment for your new winery: (This list includes Amazon affiliate links.)
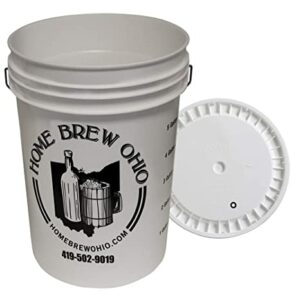
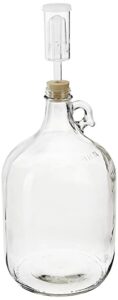
- 1 gallon primary fermenter with an airlock lid or 5-gallon primary fermenter with an airlock lid (for your fermentation vessel)
- 1 gallon carboy or 5 gallon carboy (for secondary fermentation)
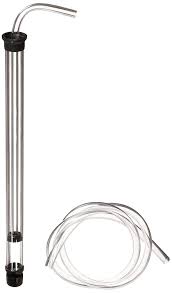
- Siphon
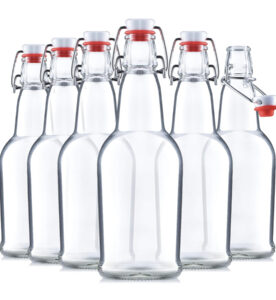
- Flip top bottles (not needed until after 5-6 weeks of fermenting)
How to Make Pear Wine
This recipe defaults to make 1 gallon of pear wine. You can click the 5x for the 5 gallon pear wine recipe. Make sure to use fresh pear fruit from the tree! Store-bought fruit has preservatives, which will prevent the wines from fermenting.
Pear Wine
Equipment
Ingredients
- 5 lbs Ripe pears (about 10 pears)
- 2⅔ lbs Honey (about 3.5 cups)
- 3 cups Raisins
- 1 gallon Water (divided)
Instructions
- Dilute honey in 1/2 gallon of hot water (not boiling), set aside to cool.2⅔ lbs Honey (about 3.5 cups), 1 gallon Water
- Add ripe, unpeeled pears and raisins to the fermenting container. If using sugar instead of honey, alternate layers of pears, raisins, and sugar.5 lbs Ripe pears (about 10 pears), 3 cups Raisins
- Add cool diluted honey to the fermenting bucket.2⅔ lbs Honey (about 3.5 cups), 1 gallon Water
- Add the remaining ½ gallon of water, leaving at least ¾" headspace for bubbling.1 gallon Water
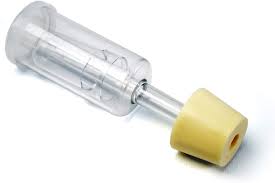
- Add water to the airlock, and seal it into the lid.
- Store in a cool dark place. Bubbles should start forming in the airlock within 24 hours.
- After bubbling stops (about 4-6 weeks), siphon liquid to the glass carboy container. Avoid siphoning any debris or particles. Secure the airlock again, and allow it to sit for another 30 days.
- If wine is clear after 30 days, the wine can be bottled and aged. If the wine has particles or is cloudy, re-rack the wine into another carboy for another 30 days. Repeat this process until the wine clears.
- Wait at least 6 months to taste. Pear wine tastes best after aged 6 months to 1 year.
- Enjoy!
Nutrition
Pear Wine Recipe Substitutes:
- Cinnamon: can give a pear cobbler taste to the moonshine
- Raisins: give the alcohol more body, meaning that the flavor will sit on the tongue longer
- Sugar: Sugar can be used in place of honey, use 6 cups of sugar per gallon of homemade pear wine. (For cheap brewing!)
- Pear Preserves: Preserves may be used in wine, just make sure there is no potassium sorbate added (this will prevent the yeast from fermenting).
- Acid Blend: an optional ingredient that helps to balance the acidity, making the yeast’s job of fermentation easier
- Pectic Enzyme: an optional ingredient that breaks down pectin in fruit, which can help prevent pectic haze, and also helps extract the color and juice from the fresh fruits
Other Pear Recipes:
If your pear tree is full of pears, check out our other pear recipes:


Our Other Homemade Wine Recipes:
If you’ve enjoyed this recipe, please rate it! Check out our other recipes:


Awesome recipe! Can’t wait to try it!
Can I use yeast to speed up the process?
Yeast may speed up the process, if there is a lack of natural yeast. Adding yeast is mainly extra security that there is enough yeast present for fermentation to occur. Extra yeast might give the batch a bit of a jump start, but you’ll only save a day or two.
First time doing this…one of my jars has a moldy looking substance on top. Suggestions? Is it a total loss?
Mold doesn’t commonly grow in mead or wine while fermenting. It’s likely yeast being pushed to the top. You could always add a campden tablet to be safe, but as long as the equipment was clean and sanitized, it should be fine. If it is in fact mold, then it would be a loss. Depending on how long the batch has been fermenting, I would wait it out and see.
Was super easy to make! I’ve got a pear tree in my backyard so had way too many pears this year. My sister was talking about how she loved pear wine, but I didn’t want to buy all the equipment for one batch so I made her moonshine instead. I just transferred it all into 3 flip top bottles. I’ll give an update on how it turned out after Christmas! (I used honey instead of sugar so my fingers are crossed the extra flavor is a nice edition!)
Awesome! Can’t wait to hear how it turned out!
Should I be concerned of botulism with this recipe?
Botulism does not typically grow in homemade brews, as the alcoholic environment does not allow it to grow. Even if there were botulism present in the honey used in the recipe, the brew will be too acidic and would kill the botulism. Allow it to ferment the proper amount of time, and you should be able to smell the alcohol when racking it into a new carboy or bottling. You can always use a hydrometer (Amazon affiliate link) to check your specific gravity and alcohol content to be safe.
Will this same recipe work with apples instead of pears?
This recipe may work for apples (I haven’t tried it myself yet… my baby apple trees aren’t producing enough yet). I might add a packet of wine yeast and a cup or two of raisins, just to make sure that it turns out. Let us know how it turns out!
are amber swing top bottles better than clear ones for the second fermentation.
UV light isn’t good for long term storage. If the bottles are stored in a dark basement without natural light, the clear ones are probably fine. I would buy the amber ones (if they are similarly priced) just to be safe.