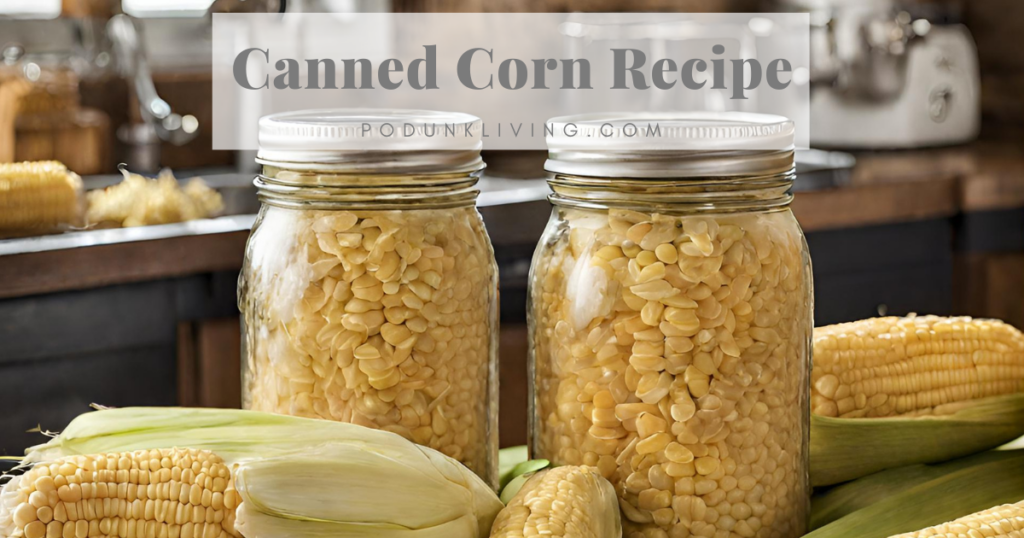
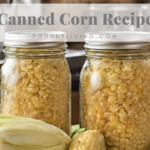
Canned Corn Recipes
This Canned Corn Recipe will have you corn-templating a career as a corn star! We welcome you to the world of canning, where your gardening skills will shine brighter than a Hollywood premiere. Our canned corn recipe will roll out the red carpet to your pantry, turning it into the VIP section of vegetable preservation. It’s not just canning; it’s a cinematic cornucopia – let the corny stardom begin!
Canning Corn
Hold onto your taste buds, because canning your own corn will revolutionize your culinary world. Why will you love it? Canned corn isn’t just a recipe; it’s a golden ticket to gastronomic glory. Canning corn is so easy to do, even a corn star diva can do it. Plus, there’s an added bonus of health benefits to canning your own homegrown corn. Our canned corn recipe is your ticket to a gastronomic workout, where every sculpted kernel is a testament to flavor fitness. And all that flavor creates the most comforting of foods, sprinkled with a hint of home-cooked nostalgia. Each bite of kernels wraps you in its golden embrace, whispering tales of simpler times and grandma’s kitchen secrets. Wrapped up in a cornhusk, this recipe is the answer to all your gastronomic prayers – easy, healthy, and so delicious that it should come with a warning label.
Ingredients for Canning Corn on the Cob
- Homegrown Corn: Harvested at the peak of its sunbathing career, these golden kernels are practically solar-powered flavor bombs. They’ve spent their days soaking up rays, and now they’re ready to bring that sunshine directly to your jars.
- H2O: A splash of liquid life to keep those corn kernels hydrated and happy. It’s the water elixir for your canning masterpiece. Hydrated corn is happy corn, and happy corn makes for a blissful pantry.
- Salt of the Earth: This isn’t your run-of-the-mill salt; it’s the earthy companion that brings out the flavor in corn like a seasoned therapist coaxing out deep thoughts. Together, they create a salty symphony that’ll leave your taste buds applauding.
Equipment Needed for Pressure Canning Kernel Sweet Corn
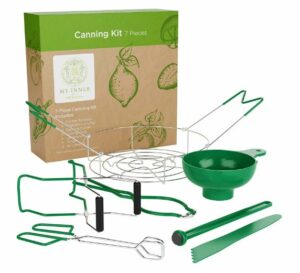
Armed with this ensemble of corny equipment, you’re ready to create a canned kernel sweet corn masterpiece that’ll leave your taste buds applauding for an encore! (This list includes Amazon affiliate links.)
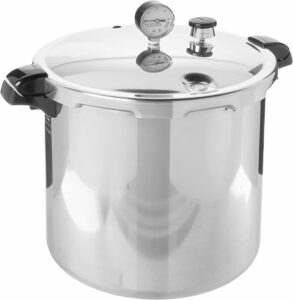
- Pressure Canner: Bow before the majesty of the Pressure Popcorn Pot, where corn kernels transcend their humble origins and pop into star-studded supernovas of flavor. It’s not just a pot; it’s a cosmic stage where corn becomes the celestial lead. (If you insist on using an electric pressure canner, use the new Instant Pot Pro Plus which is designed for canning. Do NOT trust only the manufacturer’s word on botulism safety, make sure that it is verified from an extension office. Learn more from RoseRed Homestead.)
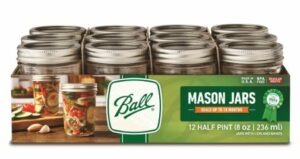
- Mason Jars: These transparent divas don the stage, ready to showcase your corny talents. With the clarity of A-list celebrities and the elegance of red carpet royalty, they’re the chosen vessels for your canned corn blockbuster.
- Canning Lids: These undercover lids join forces with your jars, conspiring to keep the corny brilliance under wraps until the grand flavor reveal. They’re the secret agents of taste, sealing in the star power of your canned corn extravaganza.
- Funnel: This funnel takes center stage, orchestrating the corny entrance into the jars like a Broadway maestro. It’s not just a funnel; it’s the director, leading the corn stars in a choreographed canning spectacle.
- Bubble Remover: Meet the Burlesquer of Bubbles, twirling and shimmying to banish any unwanted gasps from your canned corn performance. It ensures your corn is as smooth as a Hollywood dance number.
- Lifting Tongs: With the grace of a red carpet escort, these tongs lift your jars from the boiling backstage to the pantry limelight. They’re not just tongs; they’re the stagehands of your corny canning production.
- Kernel Knife: The Kernel Katana slices through corn like a ninja through the night, transforming cobs into the stars of your culinary show. It’s not just a knife; it’s the weapon of choice for corny samurai.
- Canning Comfort Cloak: Your amazing canned corn jars deserve a luxury treatment after their sizzling performance in the pressure canner. Towels below act as a potholder, and towels draped over the top allow the canned corn stars to cool down at a leisurely pace (while basking in the glory of their flavor triumph).
How to Cook Canned Corn (Kernel Crusade)
For this canned corn spectacle, we’ve gracefully established that each pint craves about 3 ears of corn, and this recipe defaults to a dazzling dozen. But fear not, the batch size of cans is in your hands! Click 0.5x for a solo, 1.5x for a mid-sized fiesta, 2x for double trouble, 3x for a triumphant trio, 4x for a quartet, and 5x for a quintessential corn extravaganza.
Canned Corn
Ingredients
- 12 Ears Corn
- Water
- 2 teaspoons Salt (optional)
Instructions
- Prepare the pressure canner by inspecting the gasket seal, gauge, and vent. Make sure the handles are secure (there are screws under the handles that can be tightened). Remove the gasket and inspect the lid, making sure that it is clean. Make sure the vent is not clogged and opens and closes easily. Replace the gasket, and apply a drop or two of oil if the gasket is not soft and pliable. Add 2 to 3 inches of water to the pressure canner, and place the tray insert to keep the jars off of the bottom of the pot.
- Husk the corn, and remove the silk. (Corn husks can be dried and saved to make tamales.)12 Ears Corn
- In a large bowl, cut the corn from the cob. If desired, milk the cob for cream style corn. (Run the back of the knife down the cob, expressing the juice from the cob.)
Raw Pack
- Loosely pack corn into jars, and add the optional salt (⅛ to ¼ teaspoon per half-pint jar, ¼ to ½ teaspoon per pint jar, or ½ to 1 teaspoon per quart jar). Ladle hot water over corn, leaving 1 inch of headspace.Water, 2 teaspoons Salt, 12 Ears Corn
Hot Pack
- Transfer corn and water to a saucepan (1 cup of water per 2 cups of corn). Bring the corn to a boil, and reduce the heat to a simmer. Simmer for 5 minutes, then transfer the corn and water into jars leaving 1 inch of headspace. Add the optional salt (⅛ to ¼ teaspoon per half-pint jar, ¼ to ½ teaspoon per pint jar, or ½ to 1 teaspoon per quart jar).12 Ears Corn, Water, 2 teaspoons Salt
Processing Instructions
- Remove air bubbles from the jars, and wipe the rim of the jar to remove any particles that can prevent a good seal. Apply lids and rings, ensuring the rings are fingertight. (Pretend that you are putting a lid on for a 3 year old to remove.)
- Process the jars of corn at 10 pounds of pressure for 55 minutes for half-pints and pints, or 1 hour and 25 minutes for quiarts. Adjust the pressure according to your altitude.
- After processing time is up, turn off the heat and allow the pressure canner to naturally release the pressure. Once the pressure has released (and the popup vent has dropped), carefully open the lid. Remove the jars from the pressure canner using the tongs, and place them on a towel in a spot where they will not be disturbed for 24 hours. Arrange the jars tightly, and cover them with a towel to prevent the jars of corn from cooling too quickly. Wait until tomorrow to check the lids for sealing.
- Wash the pressure canner with hot soapy water, and remove the gasket to wash inside the lid thoroughly. Allow it to dry completely before storing. (Taking immediate care of your pressure canner will extend its lifetime.)
- After waiting 24 hours (or at least overnight), check to see if the lids have sealed. Sealed lids will not flex up or down when the center is pressed. Place any unsealed jars in the refrigerator, and they can be eaten within a month.
Nutrition
Can Corn Recipe Substitutes
- Raw Pack: Imagine the rebellious approach where you pack your jars with raw, fresh, uncooked sweet corn kernels. It’s like sending the corn straight to the canning stage without any warm-up. The jars become the hot spot where raw meets destiny, and the result is a crunchier texture with a burst of raw corn flavor.
- Hot Pack: If you’re feeling a bit more traditional, the hot pack is your backstage pass to flavor fusion. Cook those fresh sweet corn kernels in a boiling pot of water before packing them into jars. It’s like giving the corn a pre-show spa treatment, resulting in a softer texture and a mellower flavor.
- Cream Style Corn: Turn your canned corn into a creamy sensation by transforming it into cream-style corn. Picture the kernels luxuriating in a velvety, corn-infused bath. Simply scrape the corn cob after cutting the kernels, milking the cob for its cream. This creates a luscious, creamy texture that’ll elevate your corn to a new level of comfort and decadence.
- Blanching the Corn First: Blanching is the red carpet treatment for your corn before it takes the plunge into the canning universe. Dip those sweet corn on cobs into hot water for a brief moment, then plunge them into an ice bath – it’s like a corn spa day. This process not only locks in the vibrant color but also makes it easier to remove the kernels from the cob, ensuring your canned corn is a visual and culinary masterpiece.
- Seasonings: Elevate your canned corn’s flavor profile with a dash of creativity. How about a pinch of garlic powder for a savory twist, or a sprinkle of smoked paprika for a hint of smokiness? You can also experiment with herbs like thyme, rosemary, or dill to add a fragrant touch. Don’t forget the classic duo – salt and pepper – they’re the dynamic duo of seasoning that never fails to bring out the best in corn.
Canning It Recipes:
If you’re interested in preserving your garden harvest, check out our other canning recipes: Strawberry Jam, Rhubarb Jam, and Canned Pears.