DIY Goat House for Winter
Spoil your goats next winter by building a safe, sturdy, and insulated goat house! Our shelter design not only pampers our doe divas, this goathouse stores hay in a convenient location for feeding, and includes an indoor hay feeder that significantly reduces the amount of hay the goats waste. The best part about our DIY goat shelter design is that it won’t break the bank.
Goat Barn Building Plans

Construct the floor out of green-treated lumber, spacing floor joists at a maximum 16″ on center.
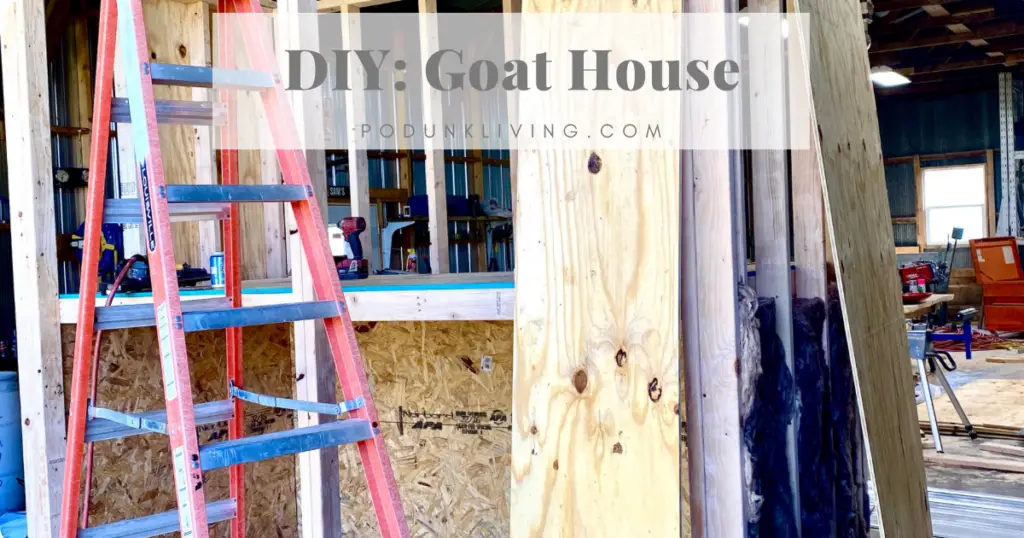
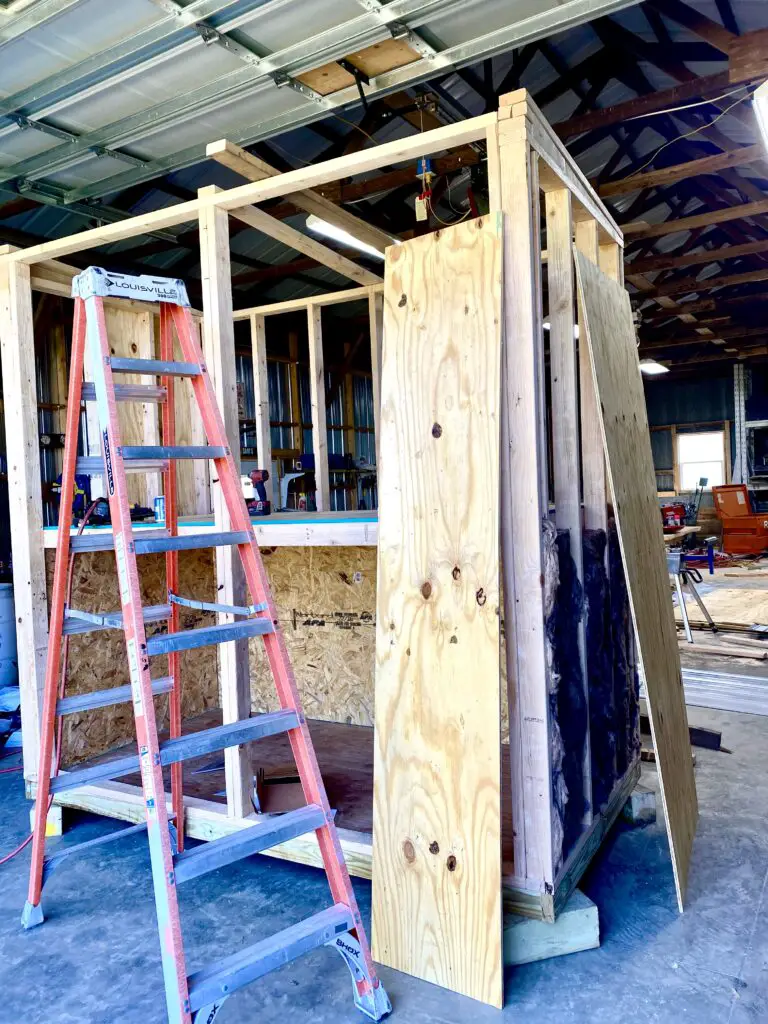
The goat house walls are built with construction grade 2×4 boards, spaced 16″ on center. The front is framed out for 2 hay loft doors above, a goat door and hay feeder door below (not finished in this picture). The hayloft floor is framed similarly to the floor, however, untreated construction grade lumber is used. Storing hay in a loft above the goats’ sleeping area is not only convenient, but also adds a TON of insulation.
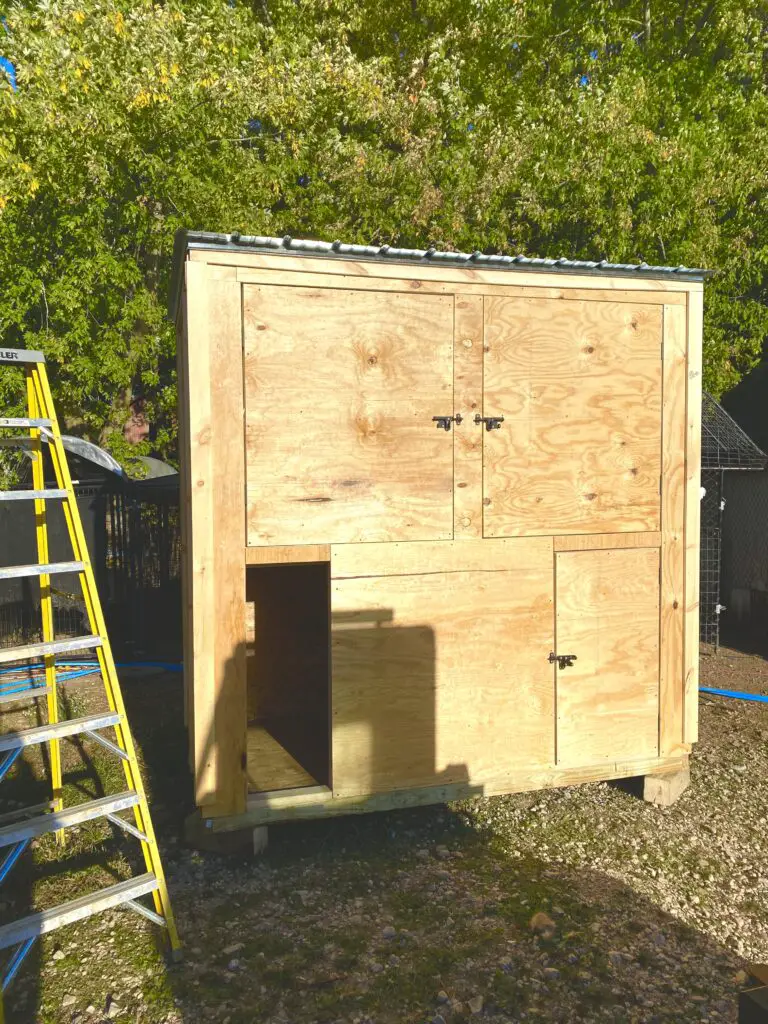
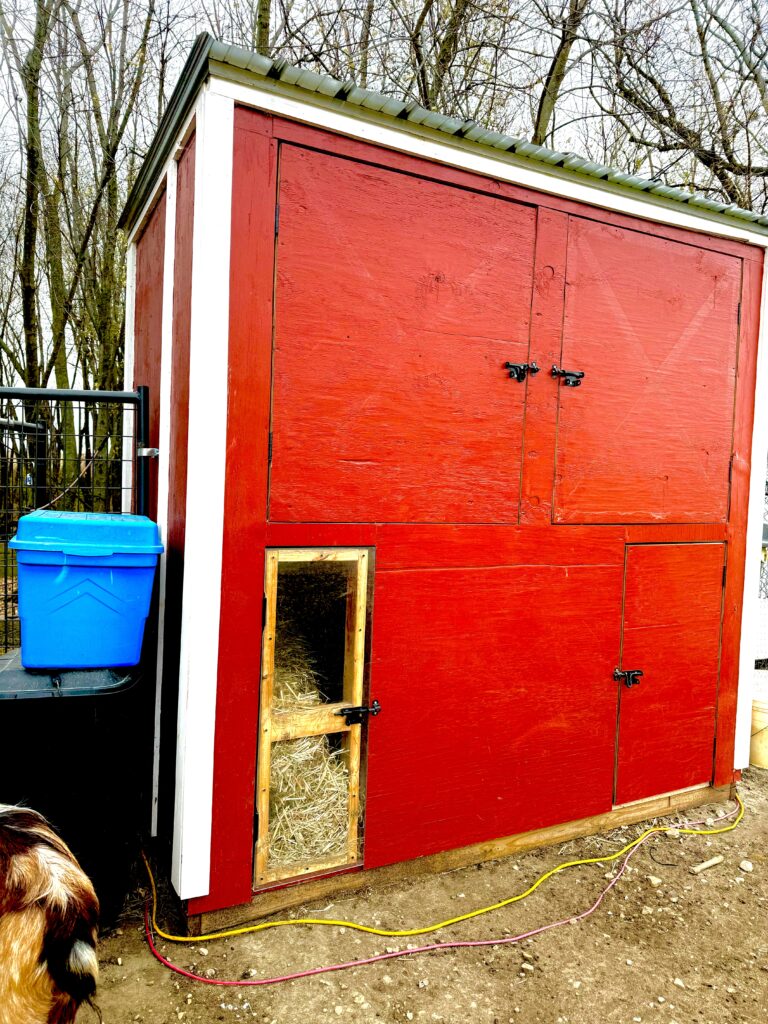
The hayloft is large enough to fit 13 small square bales of hay. The hay feeder door (bottom left) is 19″ wide x 3.5′ tall and will fit 2 bales of hay. The goat entry door (bottom right) is 24″ wide and 3.5′ tall, and is just large enough to fit our goats. There is an additional opening to the fenced-in area on the back wall.
We cut out 3 grid tees of leftover hog panels for the indoor hay feeder. To minimize hay waste, the access panel should be just large enough to fit the goat’s head and horns. This prevents the goat from repeatedly pulling their head from the feeder and dropping hay outside the feeder.
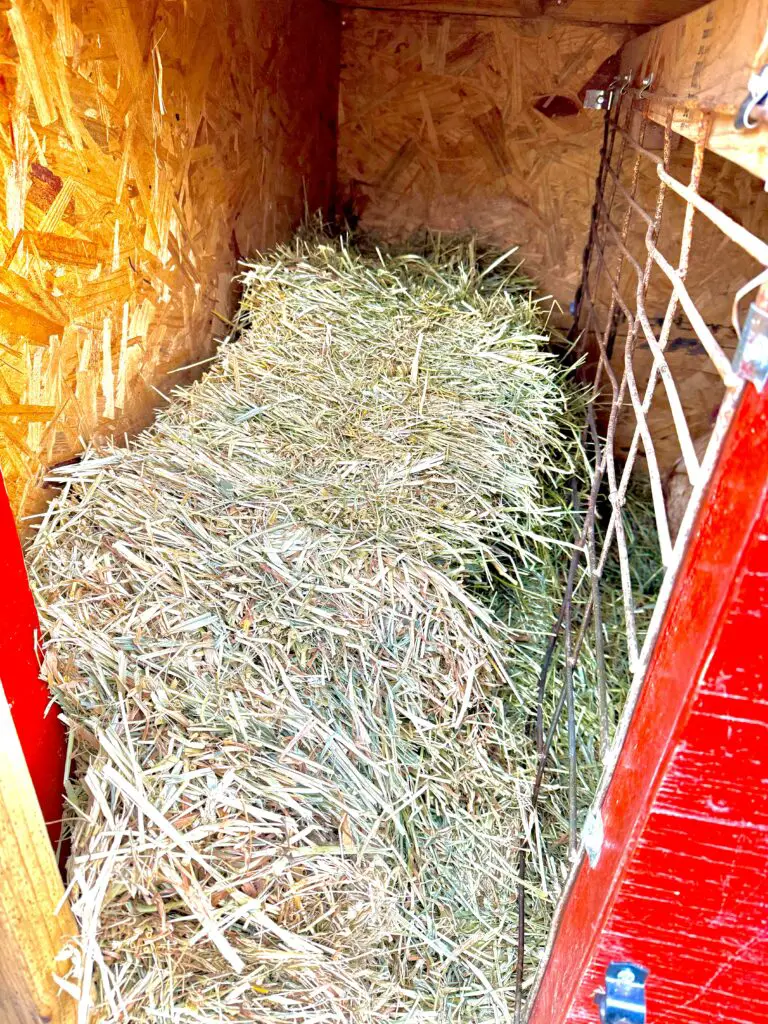
We installed an acrylic door on the hay feeder, to allow the goats to see what is going on around them while eating. Being able to visualize their surroundings prevents them from pulling their heads from the feeder, and minimizes the amount of hay being pulled from the feeder and dropped to the floor. The acrylic door is extremely thick, to better insulate the goat house.
DIY Goat Shelter Materials List and Cost
| Material | Quantity | Price | Total Cost |
|---|---|---|---|
| 2″ x 4″ x 10′ green treated boards | 7 | $7.48/each | $52.36 |
| 2″ x 4″ x 8′ studs | 60 | $4.25/each | $255.00 |
| 1/2″ 4′ x 8′ OSB | 4 | $16.15/each | $64.60 |
| 1/2″ 4′ x 8′ Sheeting | 8 | $32.25/each | $242.00 |
| 1/2″ 4′ x 8′ Green Treated Plywood | 1 | $46.27/each | $46.27 |
| 1″ x 4″ x 8′ Trim Boards | 20 | $2.98/each | $59.60 |
| 36″ x 10′ Steel Panel Roofing | 3 | $35.78/each | $107.34 |
| R15 Insulation Rolls | 5 | $16.99/each | $84.95 |
| Slide Bolt Door Latch | 4 | $5.48/each | $21.92 |
| Door Hinge | 4 | $7.48/each | $29.92 |
| Outdoor Paint Gallon | 1 | $39.14/each | $39.14 |
| Outdoor Paint Quart | 1 | $22.23/each | $22.23 |
| Roofing Screws Box | 1 | $9.76/each | $9.76 |
| Framing Nails Box | 1 | $14.23/each | $14.23 |
| Finish Nails Box | 1 | $4.43/each | $4.43 |
Tools Needed to Build an Easy Goat Shelter
- Skill saw
- Drill
- Hammer
- Tape measure
- Speed square
- Ladder
- Nail gun (optional)
- Plunge cut saw (optional)
How to Build a Goat House
- Start building the goat house by framing the floor, using green treated lumber spaced at a maximum of 16″ on center. Top the floor with green treated plywood. The green-treated floor will prevent rot from the goats’ urine and feces in the building.
- Lay out and assemble the shed walls on the floor. Once the walls are framed out, stand them up on the plywood floor and secure them. You may want to use scrap pieces of wood as a kicker to help hold the wall in place until the second wall can be installed to help secure the walls from falling.
- Once the back and side walls were erected, we found it easier to mark the height of the hayloft on the walls and then insulate below. This is the warm and cozy area of the goat shelter where the goats sleep and eat. Once the insulation was installed, we then hung the interior walls made from OSB.
- Install the hayloft floor and the front wall. This step is easier because the hayloft floor can temporarily rest on the interior wall OSB. Secure the floor and front wall.
- Install the roof. This step is easier now that the hayloft floor can be walked on.
- Insulate the front wall, install the front interior wall, and install the outdoor wall plywood siding.
- Construct the doors.
- Paint.
- Hang the doors and latches.
- Install the optional hay feeder.
- Fence in the goat pen, and allow the goats to inspect their new goat barn. Goat farming just got easier and more enjoyable for everyone!
Goat House Safety Considerations
Goat real estate has square footage restrictions to accommodate the goats’ love for acrobatics. The general rule of thumb for planning your barn size is 20 square feet per goat (depending on their size). We are rebels, and built our goat house at 11 square feet per goat. However, our 32 square-foot goat house has a connected fenced-in area, and fits our 2 Fainting goats and 1 Nubian goat comfortably. Our goats are free to go in and out of the goat shed as they please, and only go inside when it is cold or rainy (or when I put out fresh hay). I guess you could say their goat house is more like a cramped apartment, encouraging them to go outside more (minimizing the amount they relieve themselves in their bedding).
When you’re constructing a residence for your four-legged drama queens, it’s essential to understand the true nature of the beast. Goats can make a mosh pit look like a Sunday picnic. Picture a goat rave where headbutts and showdowns are part of the daily choreography. So, when you’re in the goat shelter planning phase, think less ‘barn’ and more ‘fortress.’ We designed our goat haven to endure the shenanigans of a few rowdy teenagers who’ve had too many energy drinks – because goats can be the “Monster” of the farmyard. Do NOT cut corners on your DIY goat house by using flimsy materials! Sure, you might be tempted to go cheap, but trust us, that’s a one-way ticket to the ‘Oops, we need to redo everything’ land. Invest wisely, build the goat hutch like it’s Fort Knox for goats.
Heating the House for Goats
Typically livestock will huddle together in brutally cold weather. My goat herd is very small, and they don’t have the ability to use the herd’s body heat to keep warm. In order to keep my doe divas warm at night, we warm their goat house with an electric radiant oil heater (the unsung hero of the farm). Nothing says ‘cozy’ like a livestock building with its very own heat source. Picture this: goats basking in warmth, enjoying their cud, and thanking their lucky hooves for the ingenious human who gave them a warm bed at night! There are a few reasons why I choose to heat our goat house with this style of heat:
- Most electric radiant oil heaters have a safety shut-off feature, which shuts them off if they are tipped over. (I have anchored ours to the wall.)
- Oil-filled radiant heat sources also have a robust cover, which radiates the heat and prevents the outside from getting too hot (reducing the risk of fire).
- Oil-filled radiators have a thermostat control, allowing the temperature to be set extremely low. I usually try to keep the goat house around 40 degrees Fahrenheit. Warm enough to keep their water from freezing, but cold enough to allow their body to adjust to the cold temperatures outdoors.
- Electric radiant oil heaters are extremely efficient. On average these heaters cost about $0.10 per hour while running, and are able to shut off for extended lengths.
Goat Barn Maintenance
- Buy quality outdoor paint! Nothing says ‘high-class barnyard chic’ like a goat mansion adorned with the finest hues of goat-approved elegance. Especially when the paint still looks great 5 years later!
- Clean bedding out in the spring and fall. Of course, you could clean their bedding more frequently, but we rednecks have too many DIY projects to do! Twice a year is the minimum for springtime freshness and autumnal ambiance for our doe divas (per the goat lady).
- Fill your hay loft before snow storms. Hoarding hay before the snow apocalypse allows your goats to stay warm and well fed, while you ride out the storm.
Rednecks With Paychecks Projects: